BIM 360 Field Web Portal: Issuing Reports
BIM 360 Field Web Portal: Issuing Reports
You can use the BIM 360 Field Reporting feature to create a
report in .pdf, excel, or rich text format that includes all issues with all
custom fields, as well as any referenced photos, documents or markups (pdf
format only for photos and attachments). To create this project snapshot of
your issues, follow the steps below:
Generating
an Issue Details Report
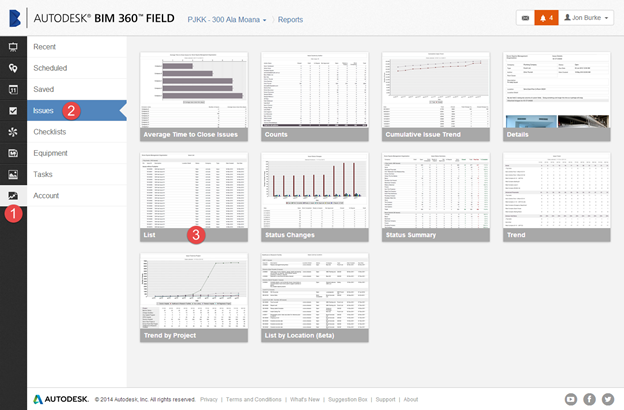
STEP 1: While logged into BIM 360 Field, click the Reports link
at the bottom of the menu on the Left side of the screen.
STEP 2: Click the Issues button located on the left.
STEP 3: Select the List button to load the report parameters of
the Issue List report.
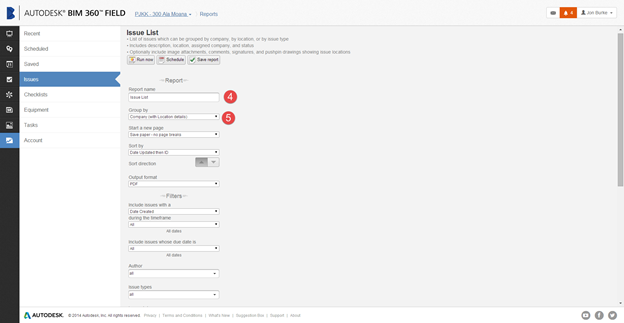
Below are the
Primary filters used when creating a report:
STEP 4: Change the Report Name to match the parameters you adjust below
STEP 5: Change the Group by drop down to Location or as desired
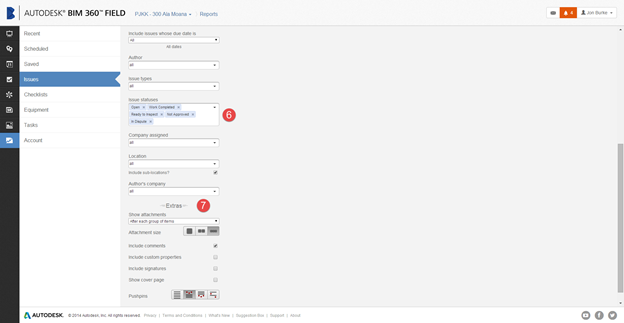
STEP 6: In the Issue Statuses drop down, select all the choices except
for closed – This will include only open issues in the report and will
not include any closed issues
STEP 7: In the Extras section, select the appropriate option
from the Show attachments dropdown and then check the boxes to include
comments, custom fields, signatures and cover page as
desired. A favorite report of some
Swinerton projects includes the selection of After each group of items
in the show attachments selection box, small Attachment size, the
Inclusion of comments, and push pins included per group.
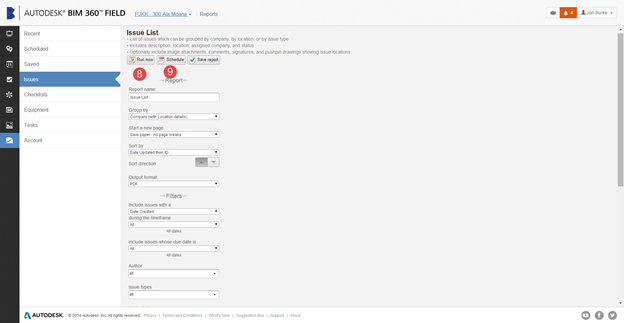
STEP 8: Click Run Now to generate the report for your project
data
STEP 9: Schedule this report to be automatically sent to subcontractors or individuals
working on the project.
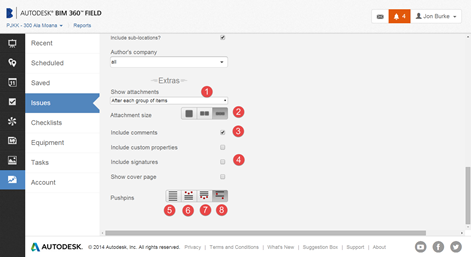
The Extras portion
of the reports menu is very important to understand. It will determine the format, organization
and information that is included on the reports. Below is an explanation of these features:
1. The Show
attachments drop down menu will provide a few options for displaying
photos, markups and pushpin locations.
If you are creating this report for a subcontractor to use, they
typically prefer this setting to be on After
each item. If this is for internal
use so that Swinerton can see all issues for each location select the option After each group of items.
2. Typically the smaller photos icon is sufficient, however, you can use medium sized or large sized attachments as desired
3. Be sure to include
the comments since this is the main means of communication back and forth
on an issue with a subcontractor
4. Select these boxes as needed depending on the custom properties, signatures and whether you’d like a cover page to be included
5. Select this icon for a list view with no pushpins locations included in the report
6. The Pins
per group button will show all the pins in a specific location on one plan
view instead of one pin per item. This
is a good overview report of each room so you can view all the issues in that
room. It’s often taped at the entrance
to that room
7. The Pins
at end of report button will include the pins view per location at the end
of the list of issues. This option is
rarely used.
8. The Pins
per item will provide a plan view of the pins locations per issue without
grouping them. This is a great report for
subcontractors so they can see each issue, fix them and move on.
The Run Now, Schedule and Save Report
options allows you to view, save and plan on when a report will be
automatically distributed. These options
automatically compile all the issues and distribute them to the correct parties
for you.
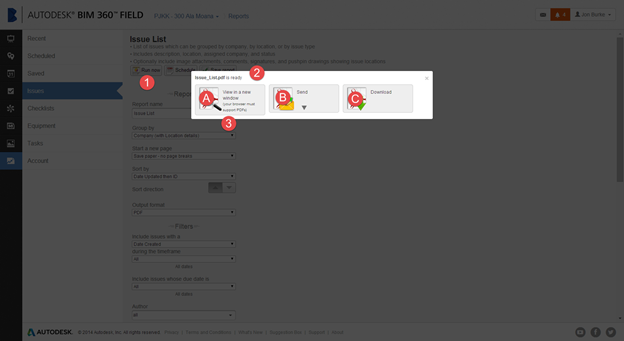
STEP 1: Once you
have selected all your filters and options, push Run Now at the top of the page.
STEP 2: After
a few moments (or minutes
depending on the size of
the report), a screen will
appear with 3 options:
A. View in new window –
Opens PDF inside 360 Field PDF viewer. You can print or download
B. Send
– Allows you to email the report
C. Download
– Downloads the report to a user selected location
STEP 3: Be
sure to View in a new window prior
to downloading, sending or scheduling for the report to be sent out
Pitfall
Alert! While you
are preparing this send document,
take care as to not click anywhere outside
the open window. The window will close and cannot be
recovered. You will have to rerun the report, but fortunately
should be listed in your Recent reports.