Standard Deliverables: Ceiling Grid Creation
Standard Deliverables: Ceiling Grid Creation
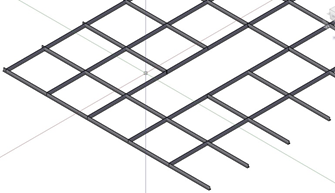
This is a effective way to provide a great ceiling
plane in your model. Not just a flat
plane, but actual T-bar modeling. This
goes great with ceiling coordination, access tiles, etc.
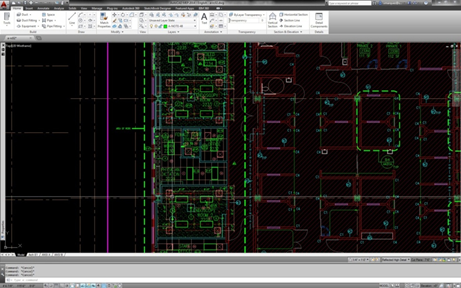
STEP 1: To begin, you must have AutoCAD
Architectural version for this to work efficiently. If you have AutoCAD Vanilla, please contact
Vincent Marquez @ vmarquez@swinerton.com. For best results, please begin with an
Architectural Ceiling Plan AutoCAD background file. Open Architectural Ceiling Plan in AutoCAD
Architectural or MEP.
STEP 2: Isolate the Ceiling T-Bar and T-Bar
Elevation Tags
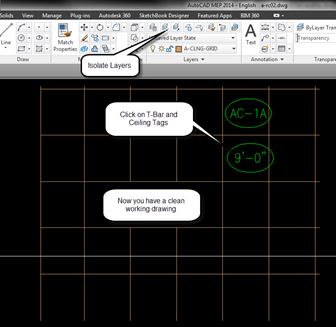
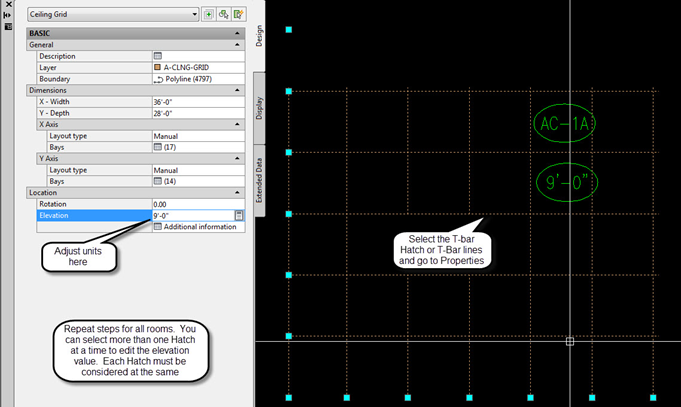
STEP 3: Now modify each T-Bar grid Hatch to the
specified elevation. If your drawing isn’t a Hatch, please elevate each line to the specified elevation.
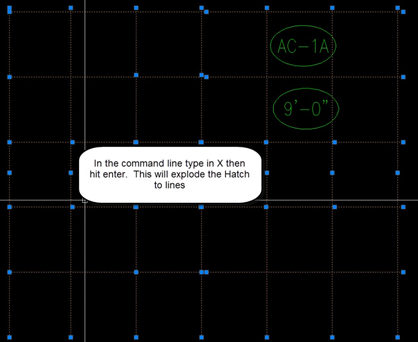
STEP 4: Once you have completed all the T-Bar
elevations, its time to “Explode” the Hatch. IF you don’t have hatches, then you do not need to explode. Exploding the hatch will break it up to allow
individual lines for each T-Bar.
STEP 5: Next you must copy and paste the T-Bar
structural Beam object from another project. To do so just open the other project select the T-bar Beam Object, Ctrl
C and Ctrl P into your new drawing. This
will load this object into your drawing.
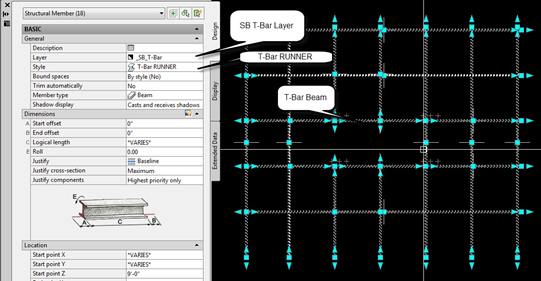
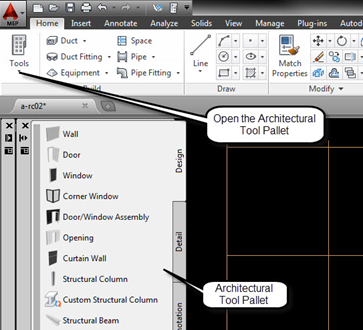
STEP 6: After
you have loaded the T-bar beam into your drawing, its time to change Lines to
Beams. To do so, open the Architectural
Tool Pallet
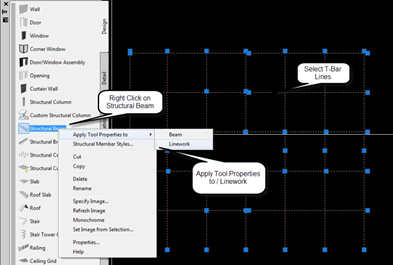
STEP 7: Next,
select all T-Bar lines (T-Bar lines only, for best results, only have this
layer on). Then go to the Arch. Tool
Pallet and right click on “Structural Beam”
Apply Properties to Linework. NOTE: you will get prompted to “erase layout geometry." This is ok to do so, but you will erase the
T-Bar linework.
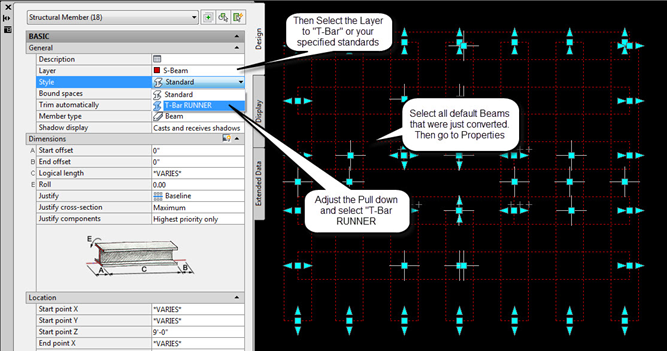
STEP 8: You will notice that all the lines will be
converted into the Default Beam Tool. Remember that T-Bar tool you copied and pasted into your drawing? You will now select all T-Bar Beams and
change the style to the T-Bar Beam
STEP 9: You should now be complete