Enter Time by "Quick Add" - (Hourly)
Enter Time by "Quick Add" - (Hourly)
Note: Quick Time works for a single project/single phase entry for a specific day.
Quick Time also works best for employees who work in a different location than their home division location.
To enter your work hours, it can be accessed by using the worklet or using the search field by typing "enter my time"
Company Holidays will populate automatically. Sick/Vacation has to be completed via Time Off worklet and then will autopopulate in Time
From the Workday Home page click on "View All Apps" or the Menu in the upper left hand corner and locate the Time app

STEP 1: Click Time

STEP 2: Click Select Week
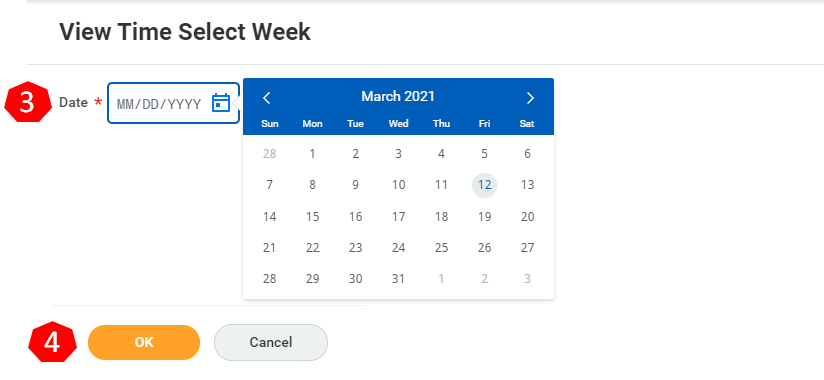
STEP 3: Click Enter the first start day of the pay period
STEP 4: Click Ok
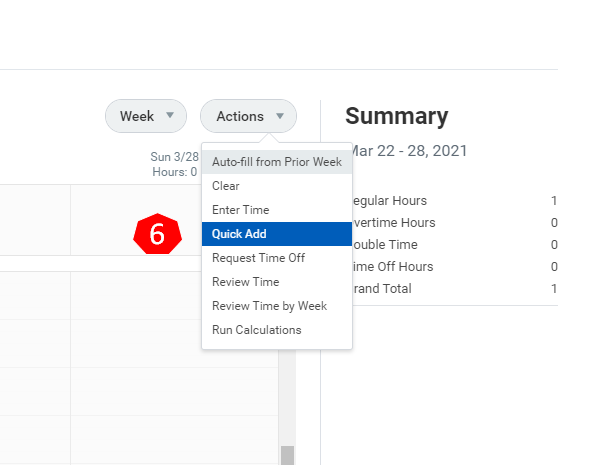
STEP 5: Click Actions
STEP 6: Click Quick Add
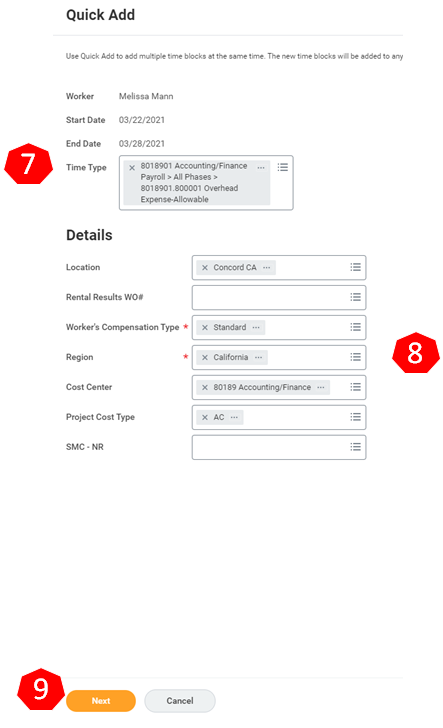
STEP 7: Click into the Time Type field to select your Job and Phase - There are two options here:
1. Most Recently Used - if you have already charged time to a project/phase, you can select it here.
2. Project Plan Tasks - Select your Job and Phase from the list provided
STEP 8: Double check that the Details are correct for your project
Note: If your work location is incorrect (not where you are physically working) you can change it by clicking in the region field and selecting the correct state, then clicking in the location field and selecting the correct city. You will need to change this for each entry into quick add. Reference THIS solution for details on how to change your location worked.
STEP 9: Click Next
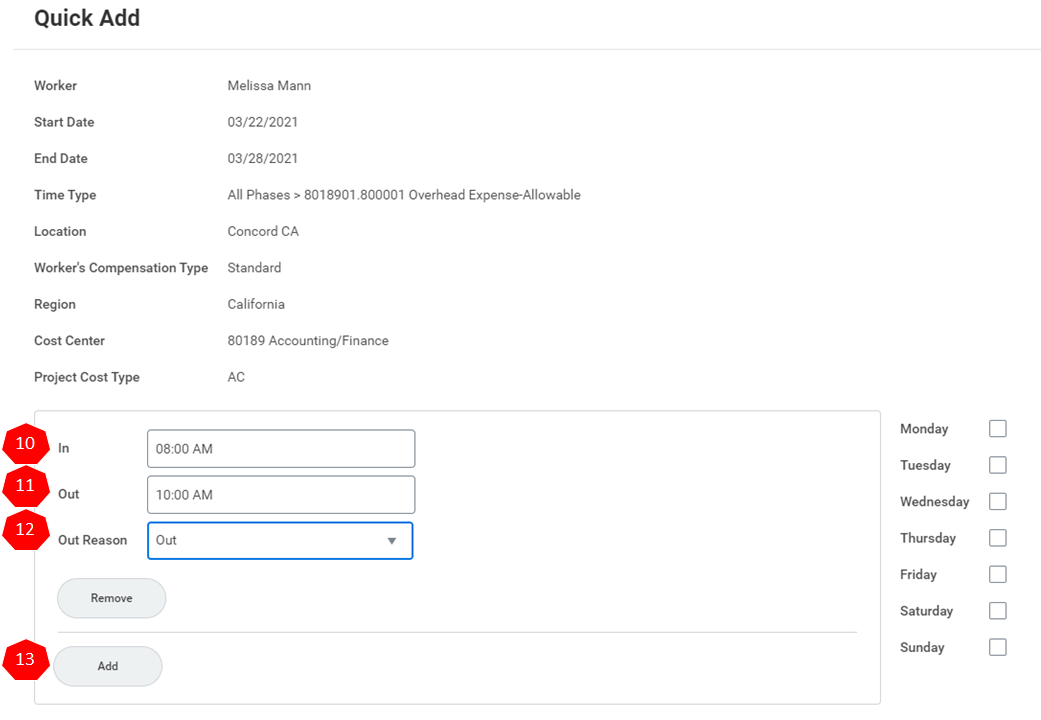
STEP 10: Enter your start time
STEP 11: Enter the time you stopped working
STEP 12: Enter your Out Reason
Note:If you are just stopping work on that project, then your Out Reason is "Out". If you are stopping for lunch, your Out Reason is "Meals"
STEP 13: Click Add
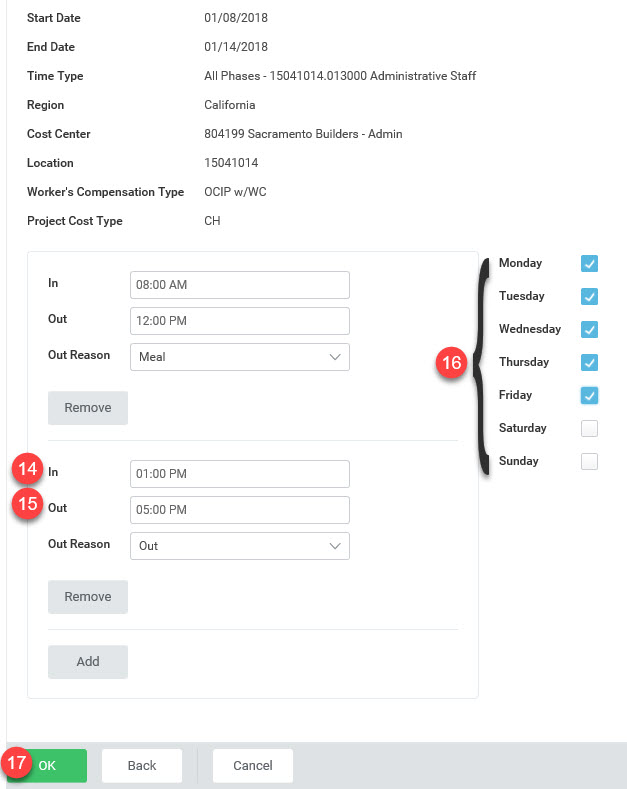
STEP 14: Enter your start time after lunch
STEP 15: Enter the time you stopped working for that day
STEP 16: Click on the days of the week you are entering time for
STEP 17: Click Ok
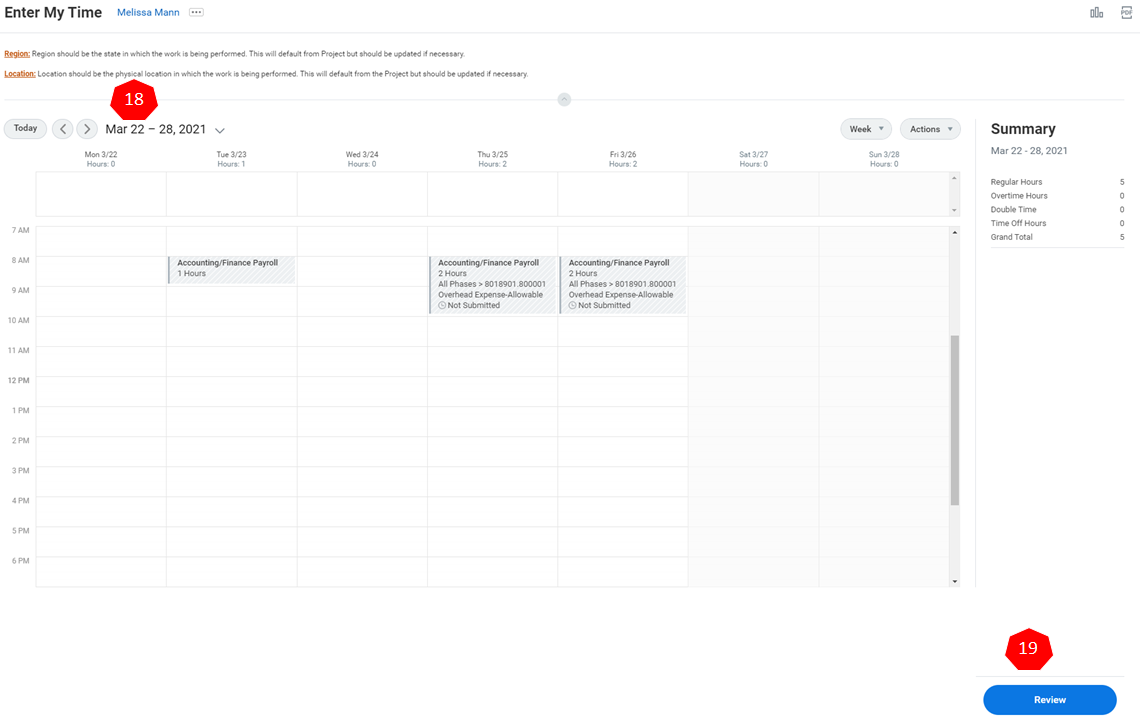
STEP 18: Click the forward arrow to take you to the next time block
Note: Complete the above process until all hours/projects are in for that pay period
STEP 19: Once all your time for that time period is entered, Click Review
STEP 20: Review all the scheduled days to make sure that you have entered hours for every day that you worked
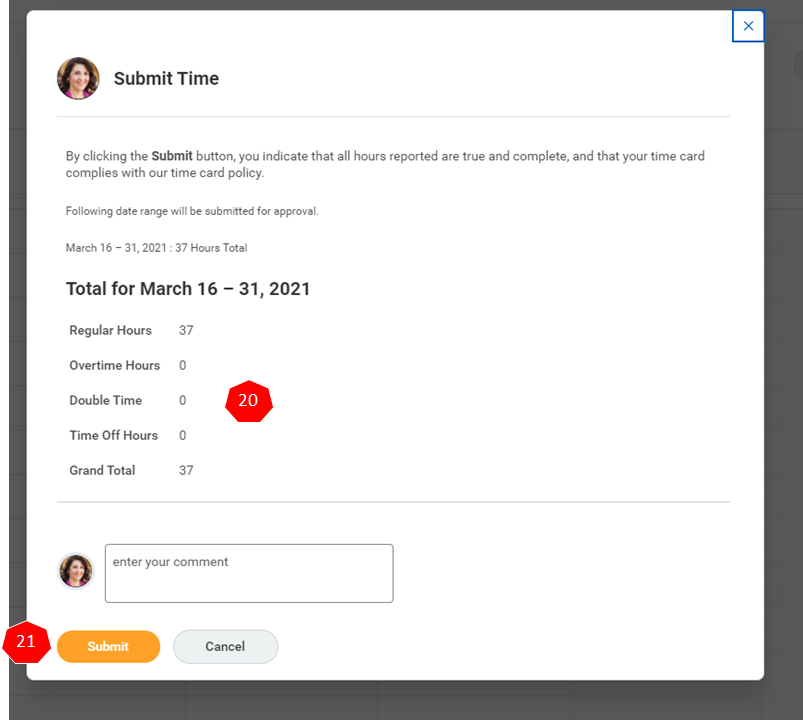
STEP 21: Click Submit
Note: Once you click Submit, your approver will receive a notification to approve your time card