Adding SSAS Data Mart to Power BI
Overview
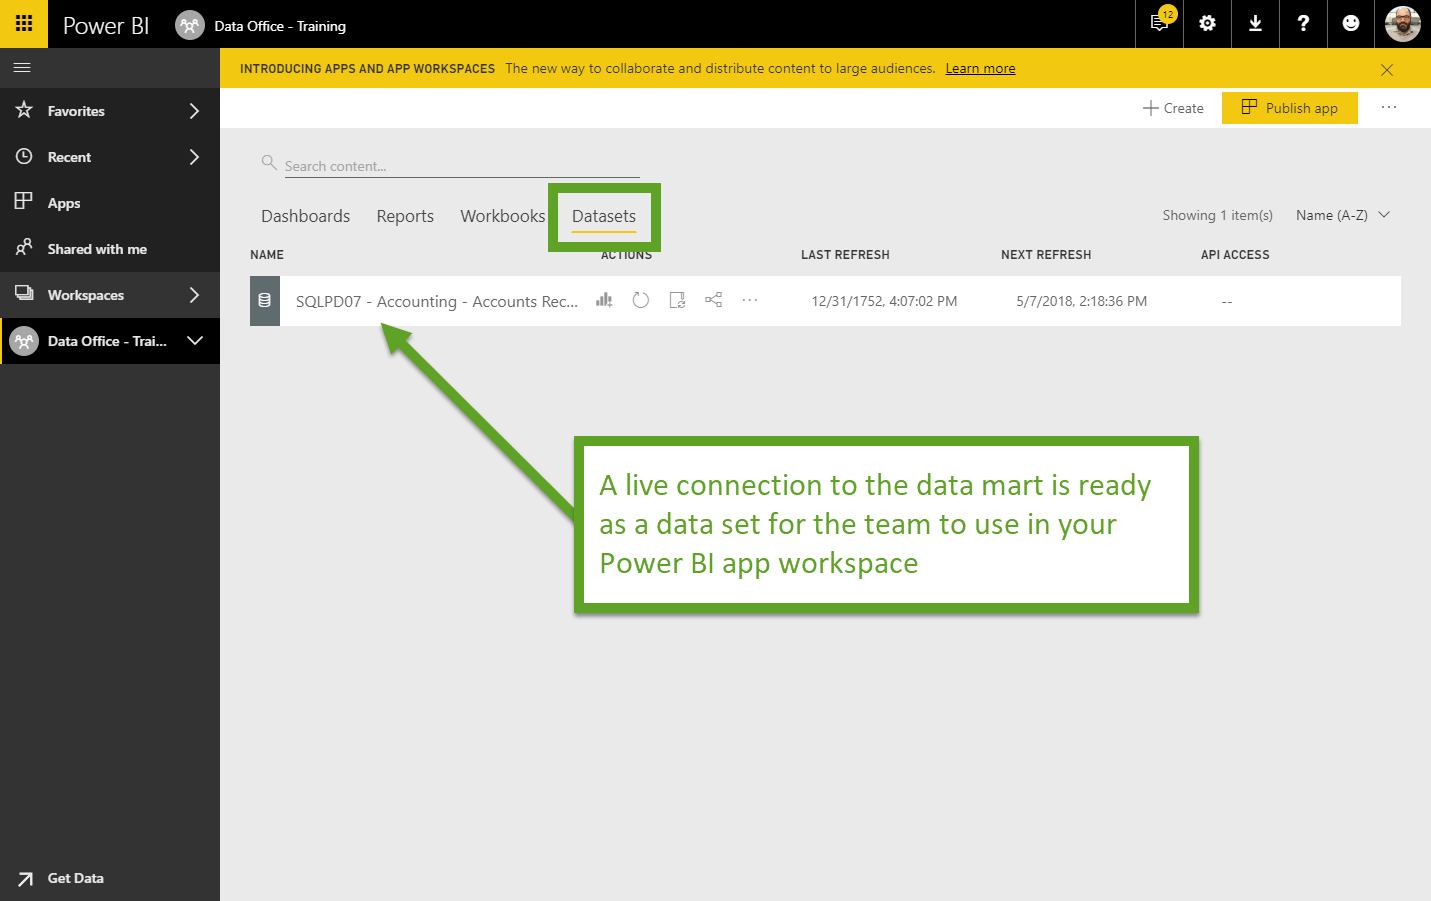
This article shows how to configure a Swinerton data mart hosted as a SQL Server Analysis Services (SSAS) tabular model as a Dataset in your team's Power BI app workspace. This will create a live connection to the data mart, which is a pre-configured data model with table relations, and field names already configured.
Prerequisites
- User must be a Swinerton admin employee
- User must have edit permissions in your team's Power BI app workspace
Procedure
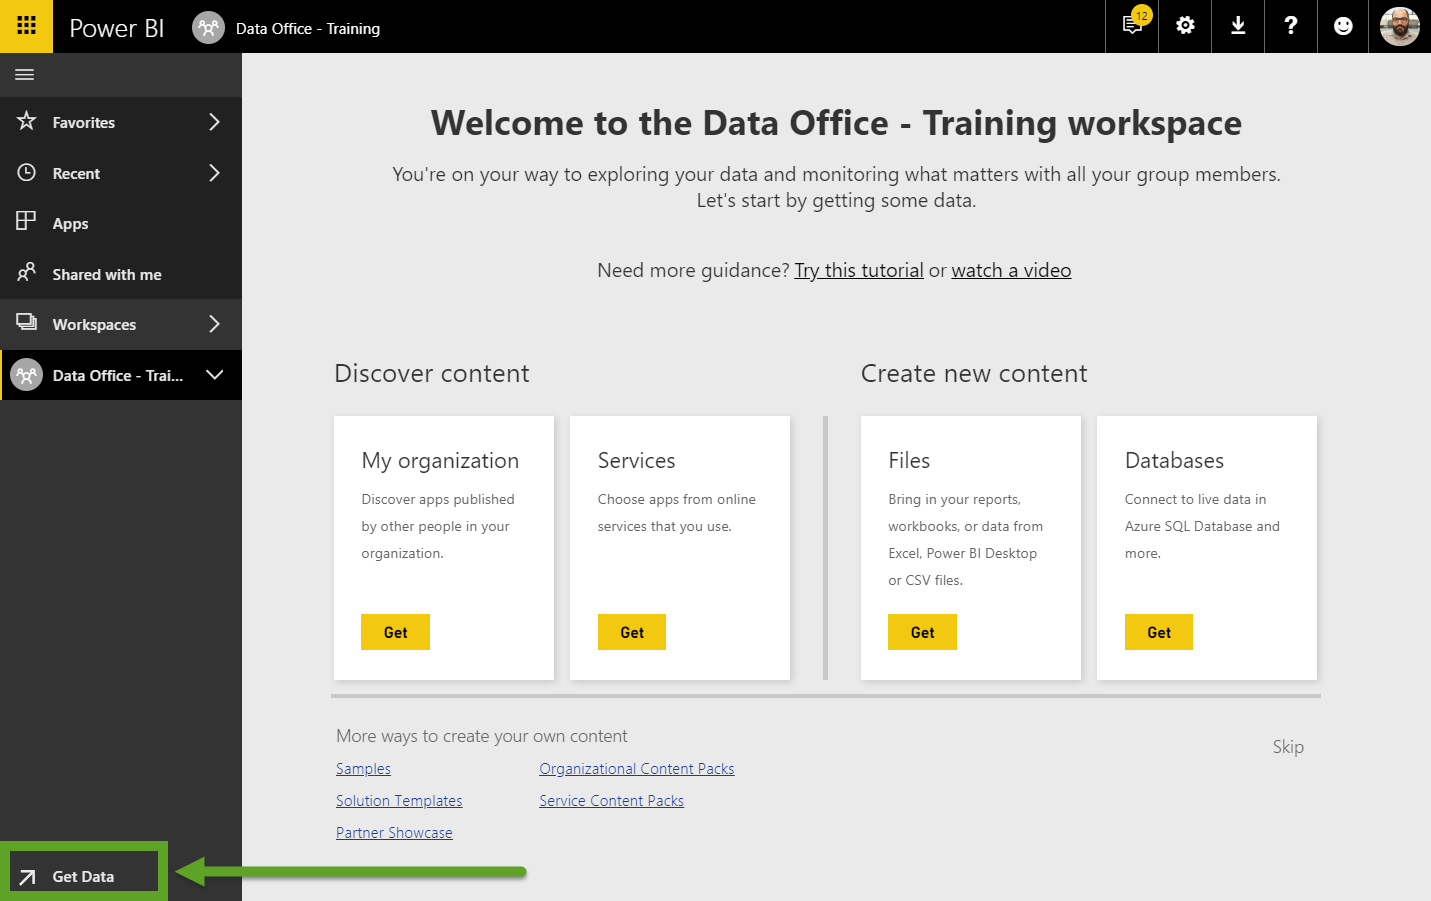
1. Navigate to the Power BI app workspace you want to add the data mart as a data source in. Note that in this example, we are using the "Data Office - Training" workspace.
2. On the bottom left of the screen, click "Get Data"
![](https://attachment.freshservice.com/inline/attachment?token=eyJ0eXAiOiJKV1QiLCJhbGciOiJIUzI1NiJ9.eyJpZCI6MTAxMjAzNTgyNSwiZG9tYWluIjoic3dpbmVydG9uLmZyZXNoc2VydmljZS5jb20iLCJ0eXBlIjoxfQ.NVlpNtJm0CF16_AZLnuesKhOfpJ6nnE0-nEmlnEJh04)
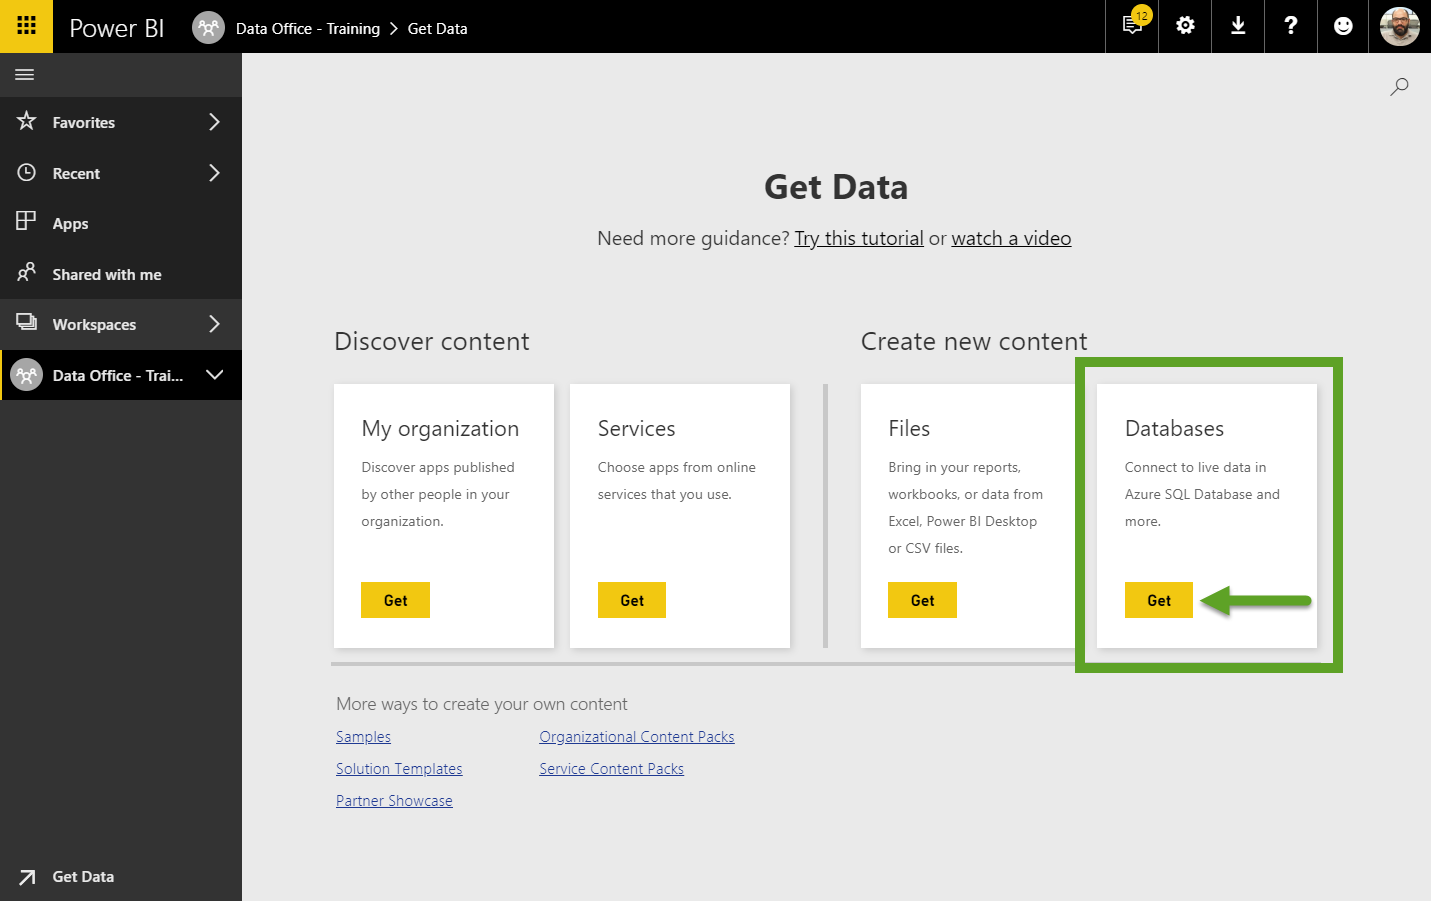
3. Click "Get" in the "Databases" portion of the "Get Data" screen:
![](https://attachment.freshservice.com/inline/attachment?token=eyJ0eXAiOiJKV1QiLCJhbGciOiJIUzI1NiJ9.eyJpZCI6MTAxMjAzNTgyNiwiZG9tYWluIjoic3dpbmVydG9uLmZyZXNoc2VydmljZS5jb20iLCJ0eXBlIjoxfQ.ZwumU0Wz7uQysxbmDuWGwW4ODdWlPAwPvPn98AC-O5A)
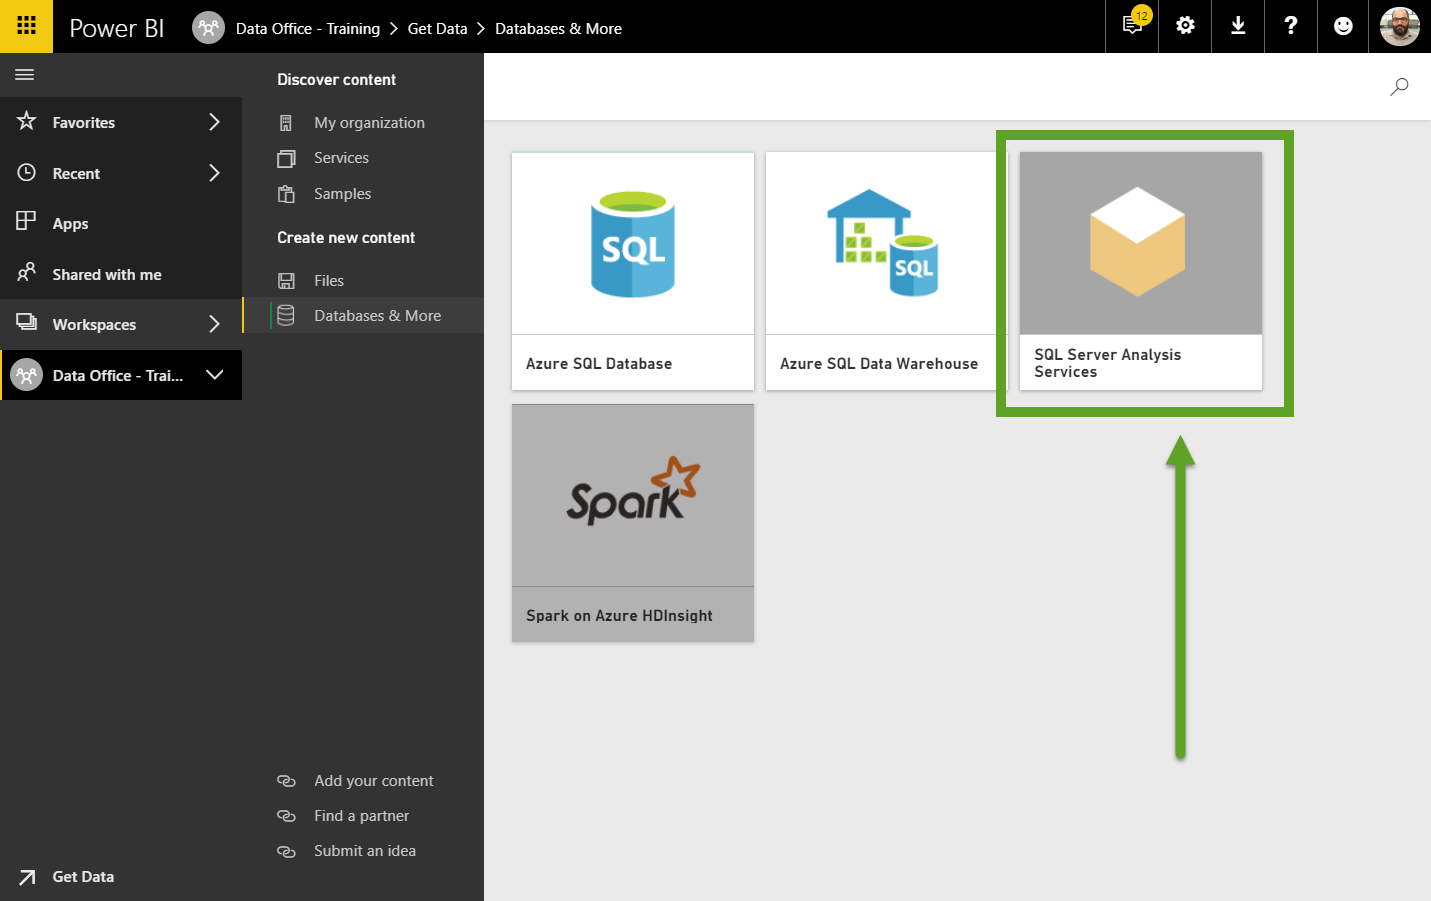
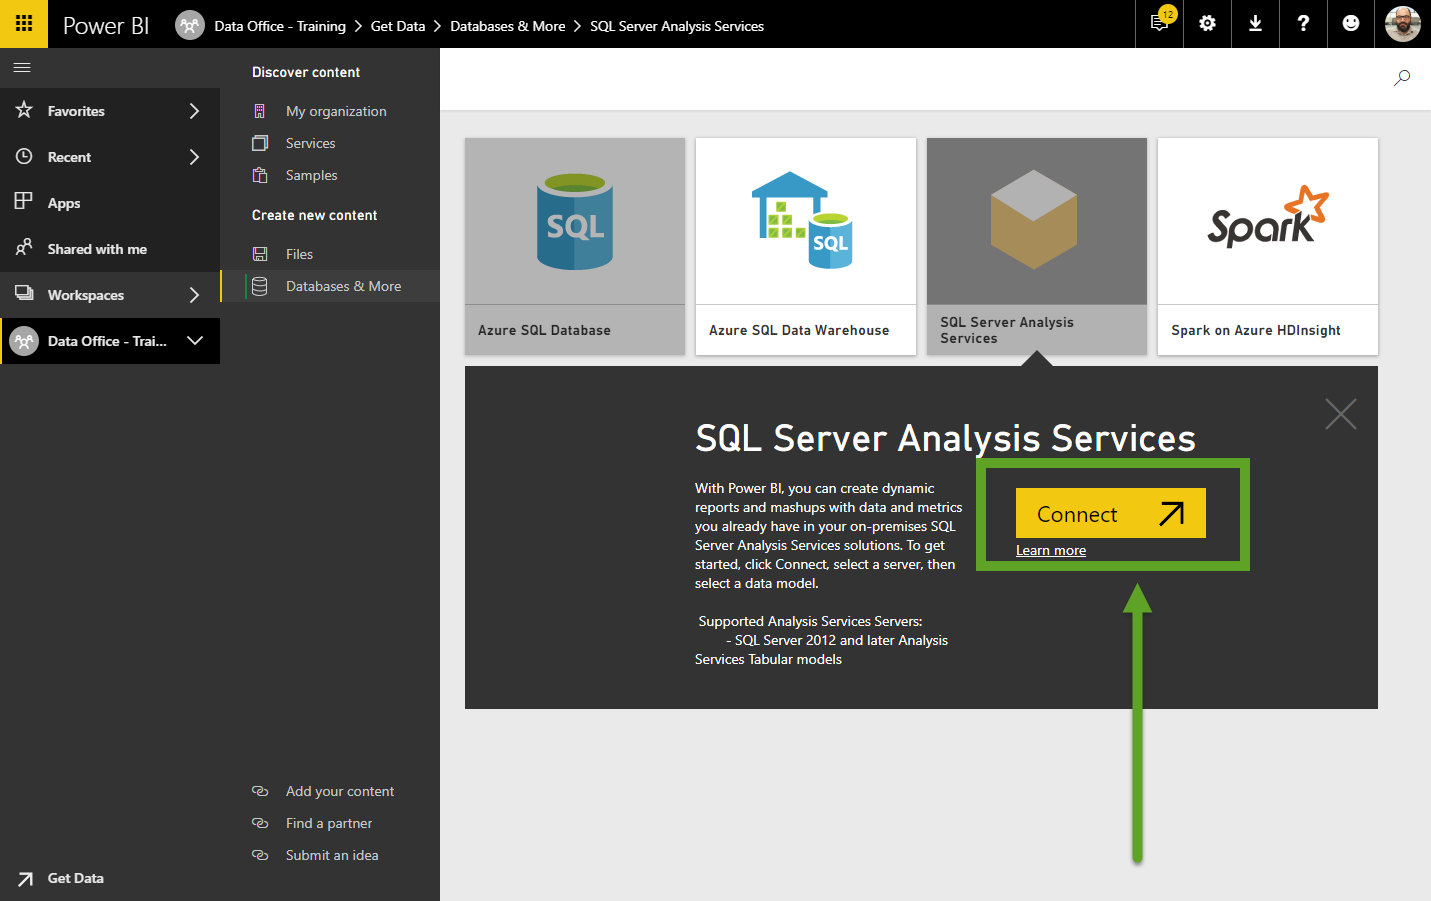
4. Click on "SQL Server Analysis Services":
![](https://attachment.freshservice.com/inline/attachment?token=eyJ0eXAiOiJKV1QiLCJhbGciOiJIUzI1NiJ9.eyJpZCI6MTAxMjAzNTg0NCwiZG9tYWluIjoic3dpbmVydG9uLmZyZXNoc2VydmljZS5jb20iLCJ0eXBlIjoxfQ.XhQ3_I0oNNdJcSL2cKkz4HjYwBQM-EacNOHbpUz_qpk)
5. Click "Connect"
![](https://attachment.freshservice.com/inline/attachment?token=eyJ0eXAiOiJKV1QiLCJhbGciOiJIUzI1NiJ9.eyJpZCI6MTAxMjAzNTg1MCwiZG9tYWluIjoic3dpbmVydG9uLmZyZXNoc2VydmljZS5jb20iLCJ0eXBlIjoxfQ.6lFL7b7EAUJ5XE0nbL7zsCcC4jSbgIXhgzmaMDrhy6I)
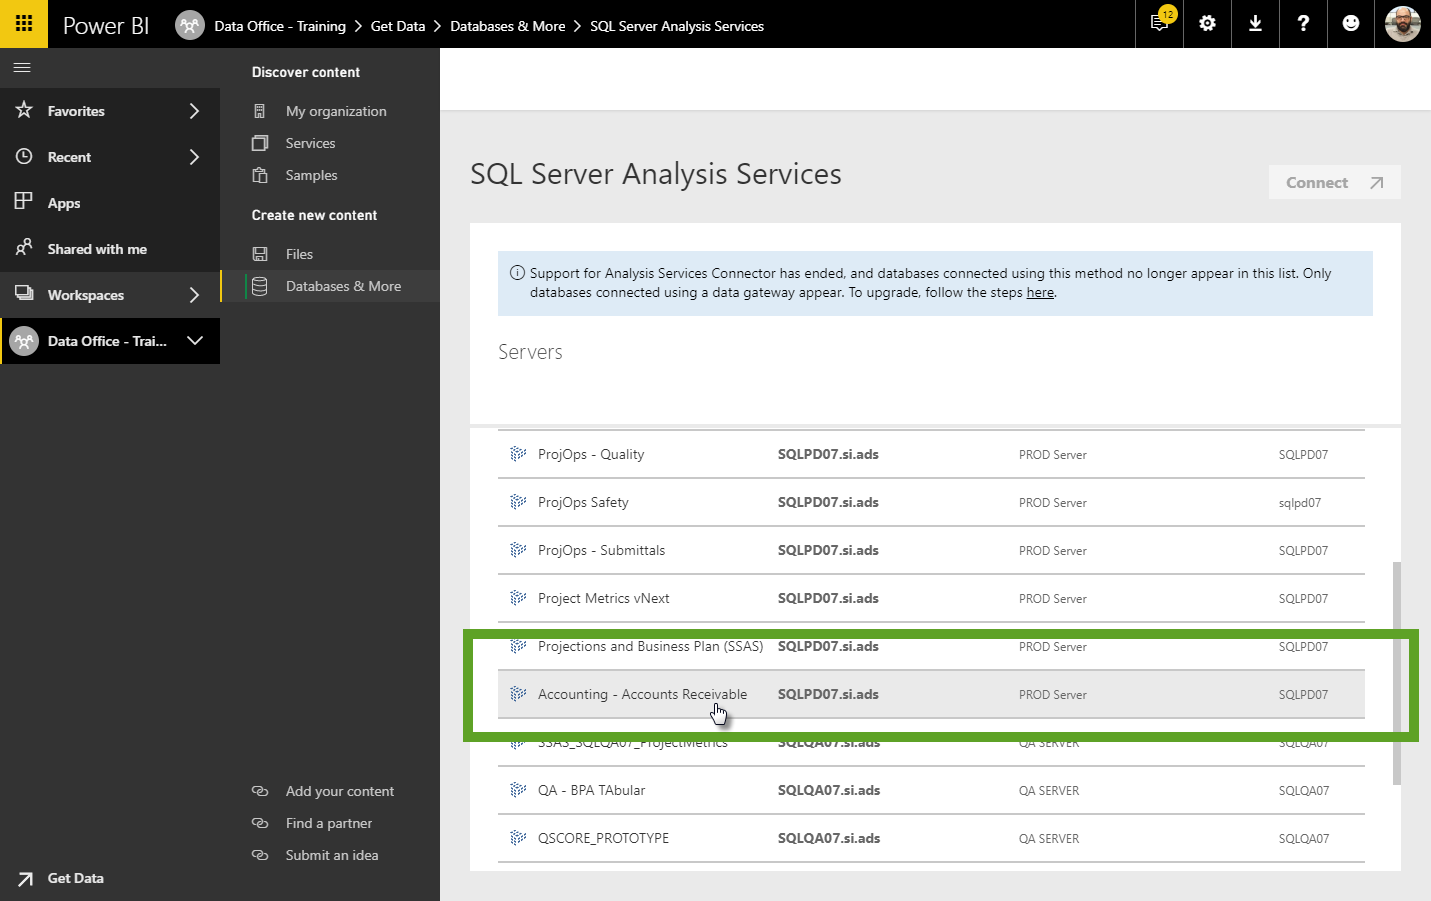
6. Search for the SSAS data mart you want to connect to. Click on it:
![](https://attachment.freshservice.com/inline/attachment?token=eyJ0eXAiOiJKV1QiLCJhbGciOiJIUzI1NiJ9.eyJpZCI6MTAxMjAzNTg1MywiZG9tYWluIjoic3dpbmVydG9uLmZyZXNoc2VydmljZS5jb20iLCJ0eXBlIjoxfQ.BJHeF2u8LxSniOJ2rpt5U4raCZtqzW9InPMU2y0KY7w)
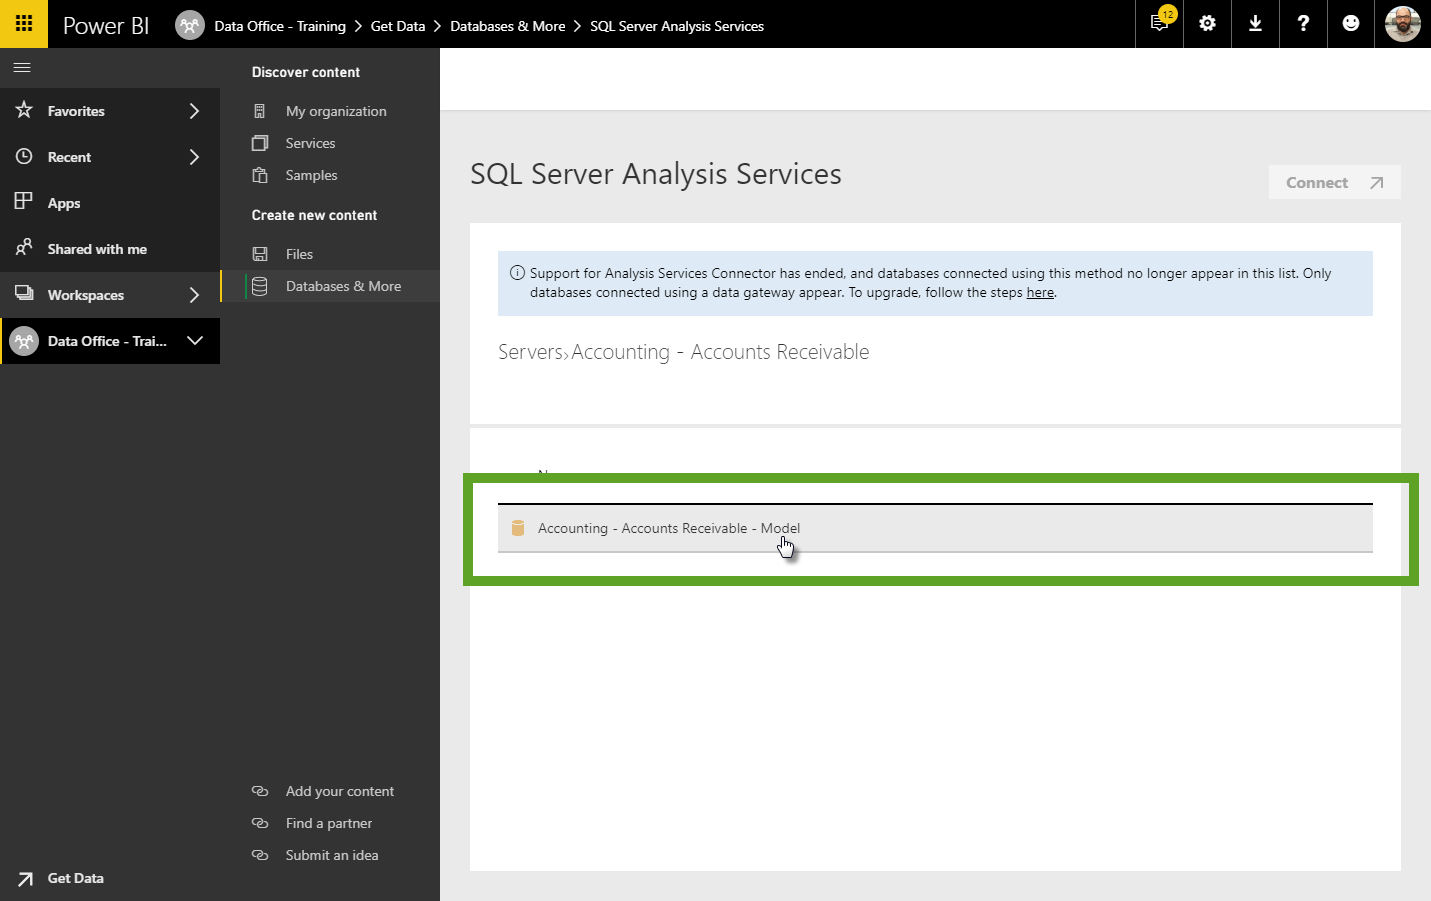
7. Select the perspective in the model you wish to use. SSAS models sometimes have multiple perspectives, but typically there is just one, named "Model":
![](https://attachment.freshservice.com/inline/attachment?token=eyJ0eXAiOiJKV1QiLCJhbGciOiJIUzI1NiJ9.eyJpZCI6MTAxMjAzNTg1OCwiZG9tYWluIjoic3dpbmVydG9uLmZyZXNoc2VydmljZS5jb20iLCJ0eXBlIjoxfQ.SIXuEczJRsKz7G4cntsCitZ7IjVtfowRtSGUbhISQqw)
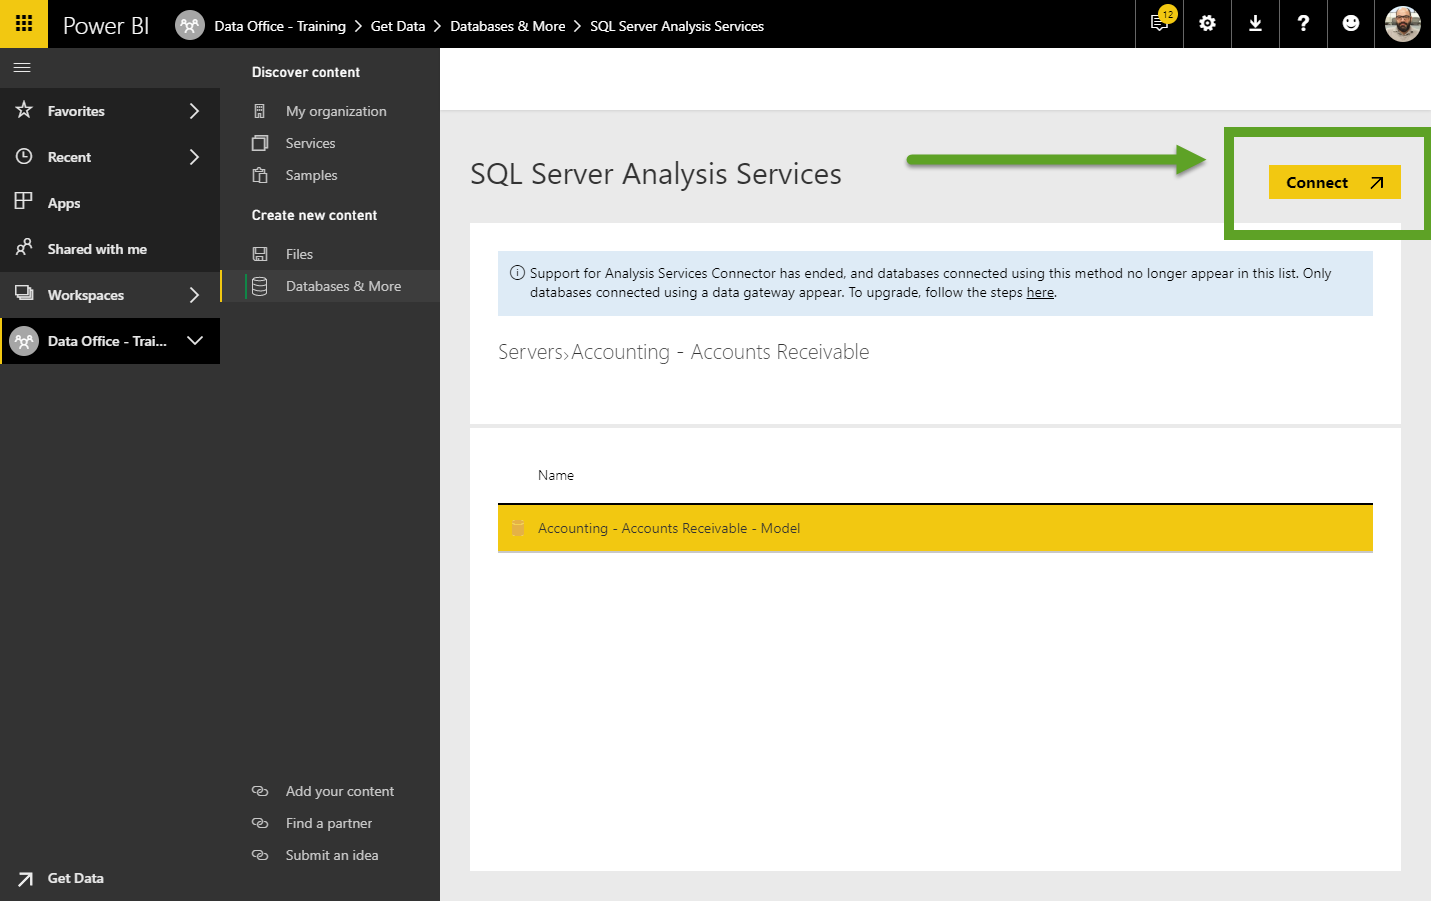
8. Once you've selected the perspective, it will be highlighted and the "Connect" button will be activated. Click "Connect":
![](https://attachment.freshservice.com/inline/attachment?token=eyJ0eXAiOiJKV1QiLCJhbGciOiJIUzI1NiJ9.eyJpZCI6MTAxMjAzNTg5NCwiZG9tYWluIjoic3dpbmVydG9uLmZyZXNoc2VydmljZS5jb20iLCJ0eXBlIjoxfQ.j_fxPAae_Rz827kix8aA6hu8fHYihmya1n-_Z7GwWcU)
9. After a moment, observe the connection to the data mart is ready to use as a data source in your team's Power BI app workspace:
![](https://attachment.freshservice.com/inline/attachment?token=eyJ0eXAiOiJKV1QiLCJhbGciOiJIUzI1NiJ9.eyJpZCI6MTAxMjAzNTkwMSwiZG9tYWluIjoic3dpbmVydG9uLmZyZXNoc2VydmljZS5jb20iLCJ0eXBlIjoxfQ.2KNib2a20BsQKpPScqQwMPmpYQ20fqSxKcBkbbCyOYo)