MAINTAINING PROJECT ROLES (FOR RESOURCE PLANS)
Maintaining Project Roles (for Resource Plans)
Overview:
This document is a guide for the Finance department on how to Maintain Project roles to be used in Resource Plans. A decision was made that the Project Role in Workday would be synonymous with the Job Profile, to reduce confusion. Both the Job Profile and the Project Role must exist in Workday for use in the Resource Plans. The Project role is used on the resource plan line, the job profile is used in the worker group assignment.
When a new job profile is created by HR, a notification should be sent to the Finance group for them to set up the corresponding project role. Once the project role is set up, it can be used in any resource plan.
Access Workday from the Desktop Icon on your computer
STEP 1: In the Search box, enter Maintain Project, the following selections will appear
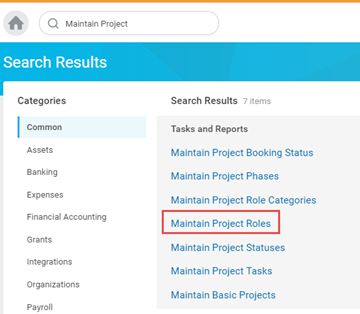
STEP 2: Select Maintain Project Roles
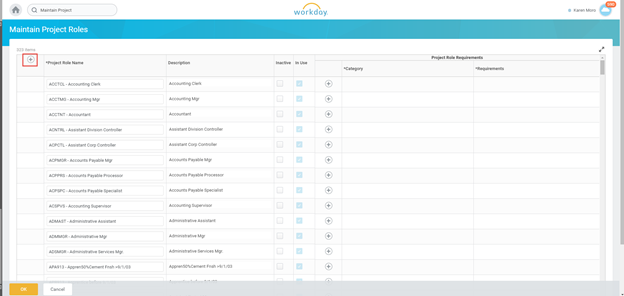
STEP 3: Before adding a new Project role, be sure to check to see that the role does not already exist and is Inactive
STEP 4: Click the ‘+’ at the top of the page to add a blank row
STEP 5: Complete the new row as follows:
a.*Project Role Name = Enter the job profile code hyphenated by the job profile description
b.Description = Re-enter the job profile description
c.Inactive = leave unchecked for initial set up
- i.Inactive = check if the project role is no longer being used (should be removed from the resource plan)
d.In Use = will be checked when the project role is assigned to a resource plan
e.Category = leave blank (not being used)
f. Requirements = leave blank (not being used)
STEP 6: Click OK when done
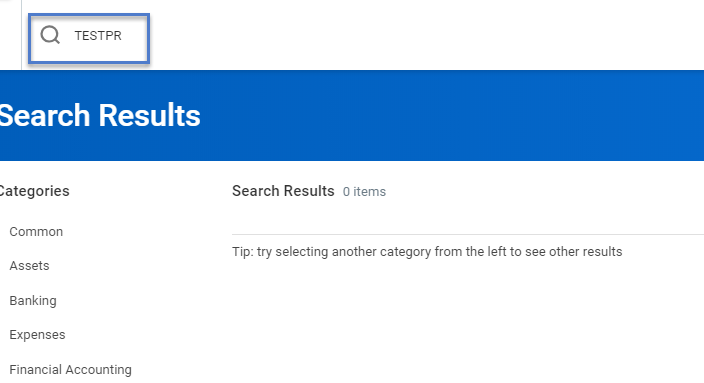
STEP 7: Enter the Project role code you just created
in the Search bar and hit enter.
STEP 8: Go to the bottom of the page and click “All of
Workday”
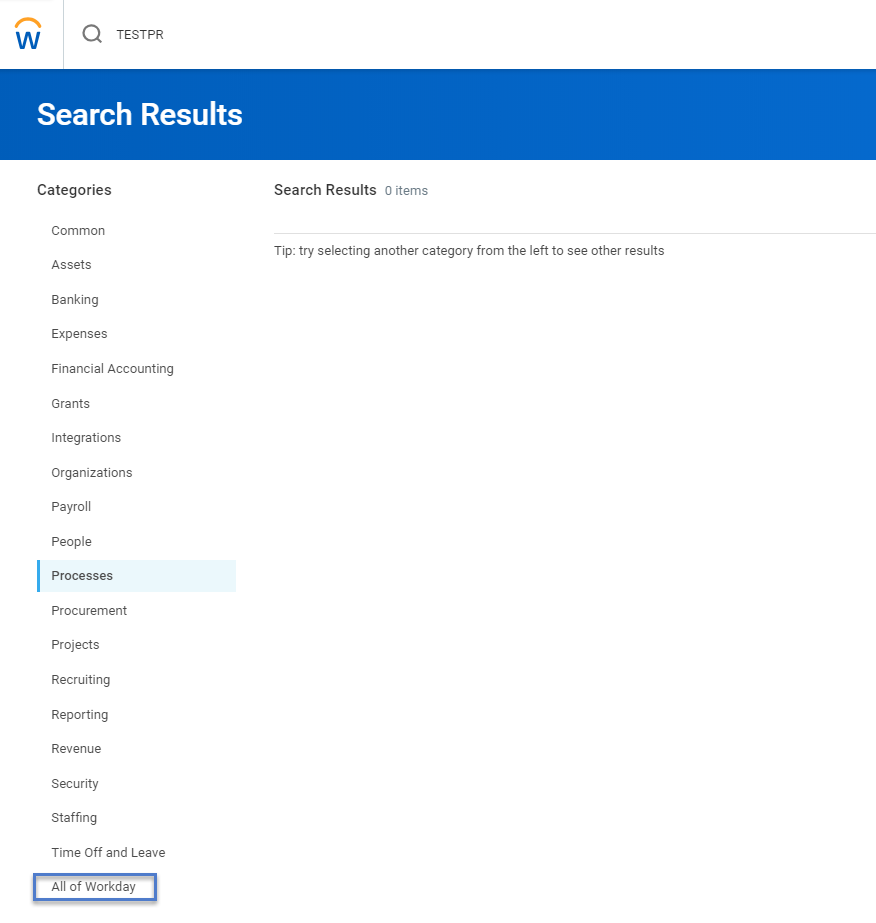
STEP 9: The project role will then display
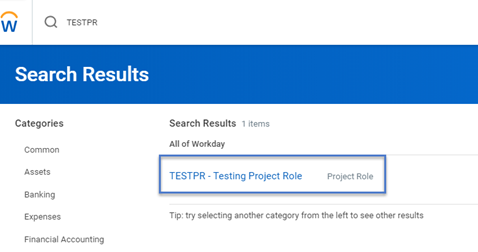
Step 10: Click on the “twinkie” next to the project
role name
a. Select Integration IDs
b. Edit Reference ID

Step 11: In the Reference ID Value field replace the
existing code with the Project Role Code you created
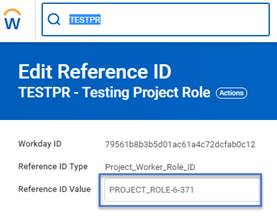
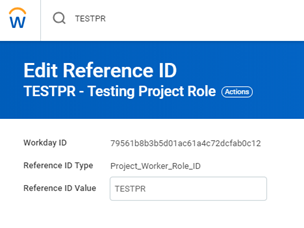
Step 11: Click OK when done.