Custom Document Library Views (Add Column, Create View, Add View to Web Part) - Advanced
Custom Document Library Views (Add Column, Create View, Add View to Web Part)
You can create a custom document library view
for a web page from the documents you uploaded into the master library. Custom document library views can be useful if you only want to display a subset of your documents related to a topic on a given web page.
PART 1: Add a Column for a Document Library View
Before you create your custom library view, you will need to add a column for filtering your documents.
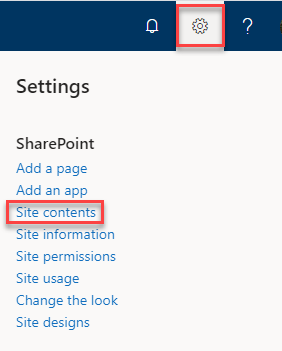
STEP 1: Click on Gear Icon (Settings). Go to Site Contents.
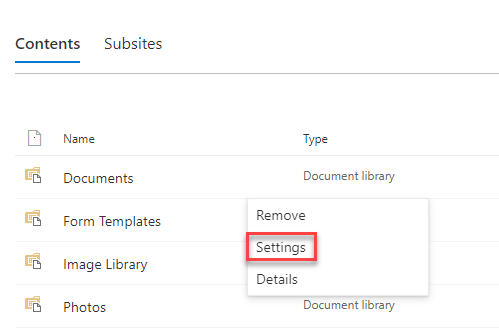
STEP 2: Click on three dots to the right of the Documents folder. Select Settings.
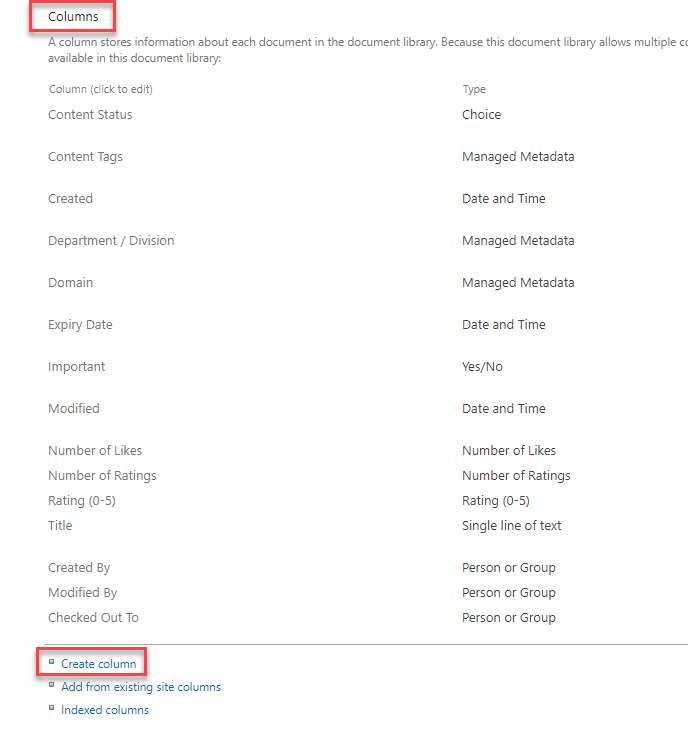
STEP 3: A page called Documents > Settings will open. Scroll down to the Columns section in the middle of the page. Click the Create Column link.
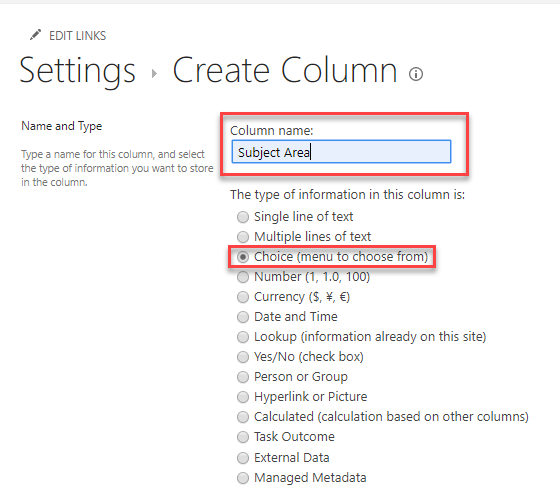
STEP 4: Enter a name in Column Name. Recommend something generic like Subject Area. Then select Choice (menu to choose from).
STEP 5: Type the choices (subject categories) to filter your documents using alpha order. These choices will be used to tag your documents. If you only want one choice per document, select Drop-Down Menu. If you want more than one choice per document, select Checkboxes (where you can tag more than one subject category). Then click the OK button.
STEP 6: You should see your new column in the list under Columns.
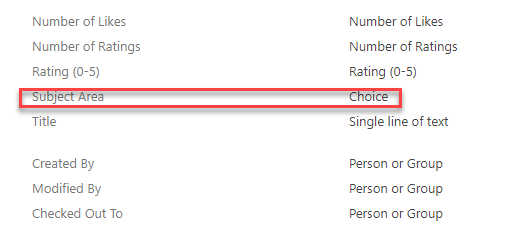
PART 2: Create Custom Document Library View
STEP 1: Click on Gear Icon (Settings). Go to Site Contents.

STEP 2: Click on three dots to the right of the Documents folder. Select Settings.

STEP 3: A page called Documents > Settings will open. Scroll down to the Views section at the bottom of the page. Click the Create View link.
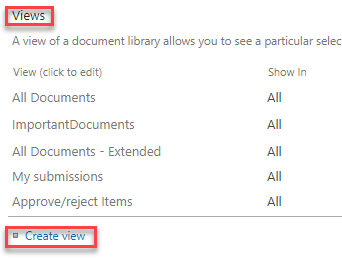
STEP 4: On the Settings > View Type page, select Standard View.

STEP 5: On the Settings > Create View page, enter the name of your new view in the View Name box.
Note: Do
not check the “Make this the default view” box.
STEP 6: For audience, leave it selected as Create a Public View.
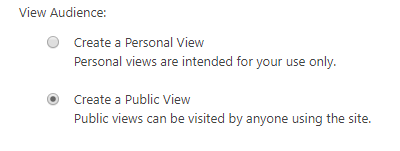
STEP 7: In Columns, select the columns and order in
which you would like them to appear (left to right). Start with Type, Name (linked to document
with edit menu), Modified By, and Modified – in that order. Uncheck Important and Subject Area. Then select other columns you want.
You can skip Sort unless you want some special sort besides alpha order.
STEP 8: For Filter, select Show items only when the following is true. Then in the pull-down menus, select the name of your new column, for example, Subject Area, and is equal to. Finally enter your subject category in the third field.
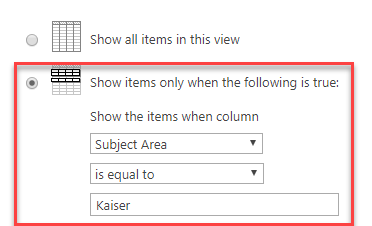
STEP 9: Then click the OK button to create the new view. You will see your new view listed at the top of the views list for your document library on the upper right hand side.

PART 3: Add View to Document Library Web Part
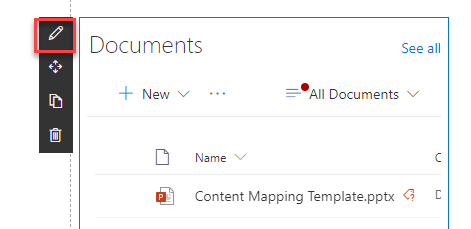
STEP 1: Click on the pencil icon in the document library web part. A panel should open on the right.
STEP 2: Under View, select the name of your view in the pull-down menu.
Optional: Click on the Show command bar toggle to hide the command bar.
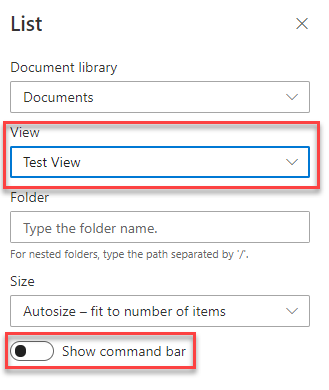
STEP 3: Click the Apply button at the bottom of the panel. You should see the view that you created appear in the document library web part on the page.