Syncing (and Stop Syncing) Teams Files with OneDrive
Syncing Teams Files with OneDrive -
It is possible to sync your Teams files to your File Explorer so that you can open and work in files much like you are used to when they are stored on the z/drive.
NOTE: These steps only need to be completed once to sync Teams to File Explorer via One Drive. After this is complete, simply click Sync in any Teams file folder and the sync will occur.

STEP 1: Open up the Team (or specific Teams Channel) that needs to be synced.
a. Click the Team or Channel.
b. Click on File.
c. Click Open in SharePoint.

STEP 2: The Team will open in an internet browser, click Documents to bring you to the Documents folder.

STEP 3: Click Sync.

STEP 4: Click Open Microsoft OneDrive.
NOTE: SSO sign in may be required.

STEP 5: From the System Tray, click the OneDrive icon.
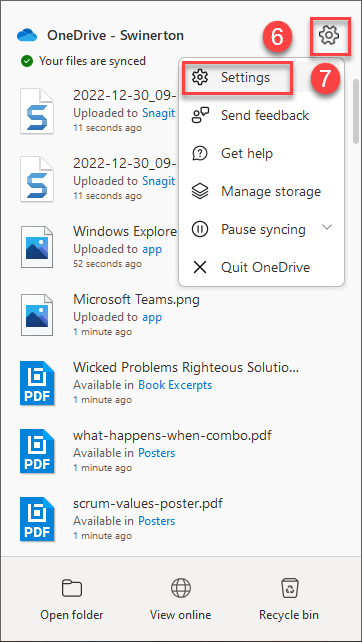
STEP 6: Click the cog in the upper right hand corner
STEP 7: Click Settings

STEP 8: Make sure the Account tab is chosen, click on Choose folders for the Teams folder you are syncing.
STEP 9: Click OK.

STEP 10: Choose only the folders to be synced with File Explorer, click OK, twice.

The Teams file folder will sync with the Swinerton OneDrive folder in File Explorer.
NOTE: Right click on the file folder and click Pin to Quick Access to add the new folder to the Quick Access folder.
To Stop the Syncing of Teams Files with OneDrive -
NOTE: When the time has come to stop syncing the folder to your File Explorer, DO NOT DELETE IT! Deleting it will sync to Teams and delete the entire folder. Rather than deleting it, go back into Onedrive Settings, click Account and click Stop Syncing.

STEP 1: Right click on the One Drive icon.

STEP 2: Go to Help & Settings>Settings>Account and click Stop Sync to the folder you want to remove from File Explorer.
Only after you have stopped the sync, can you then go to File Explorer and delete the folder from your menu. Before doing so, verify that the files in the folder are no longer syncing.
