Content Expiration
Content Expiration
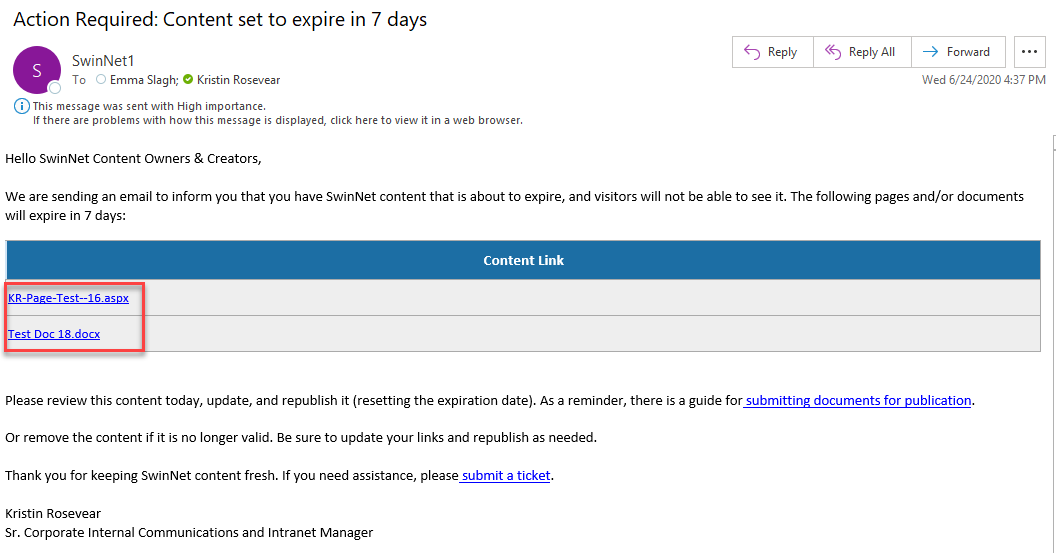
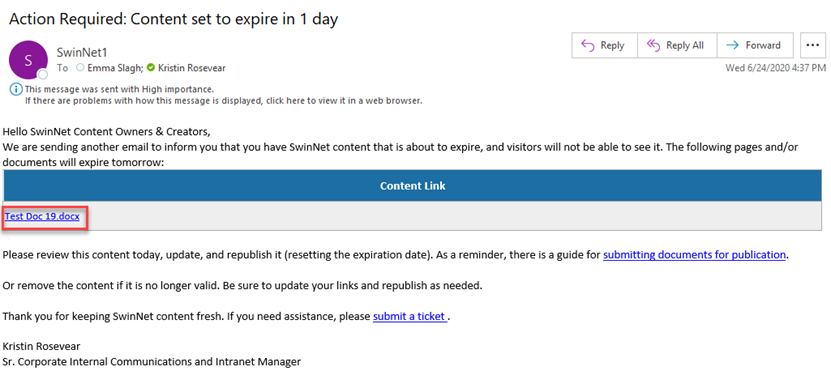
Content will expire according to the Expiry Date you set when you published your page or document. Page Owners and Creators will receive two email notifications, 7-days and 1-day before expiration. The following are the actions you can take.
PART 1: Responding to 7-day Notice
STEP 1: Click on the link(s) in your email notification to review the content (page and/or document).
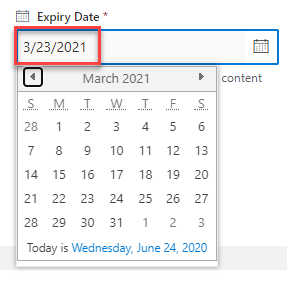
STEP 2: If the content is still relevant, either keep as is or edit, and then reset the Expiry Date in page or document properties. Be sure to hit the Enter key after entering the date to save it.
You can make the expiration date a maximum of 364 days in the future (a day before one full year). For example, if the current date is 3/24/21, the expiration date will need to be set to 3/23/21 to save.
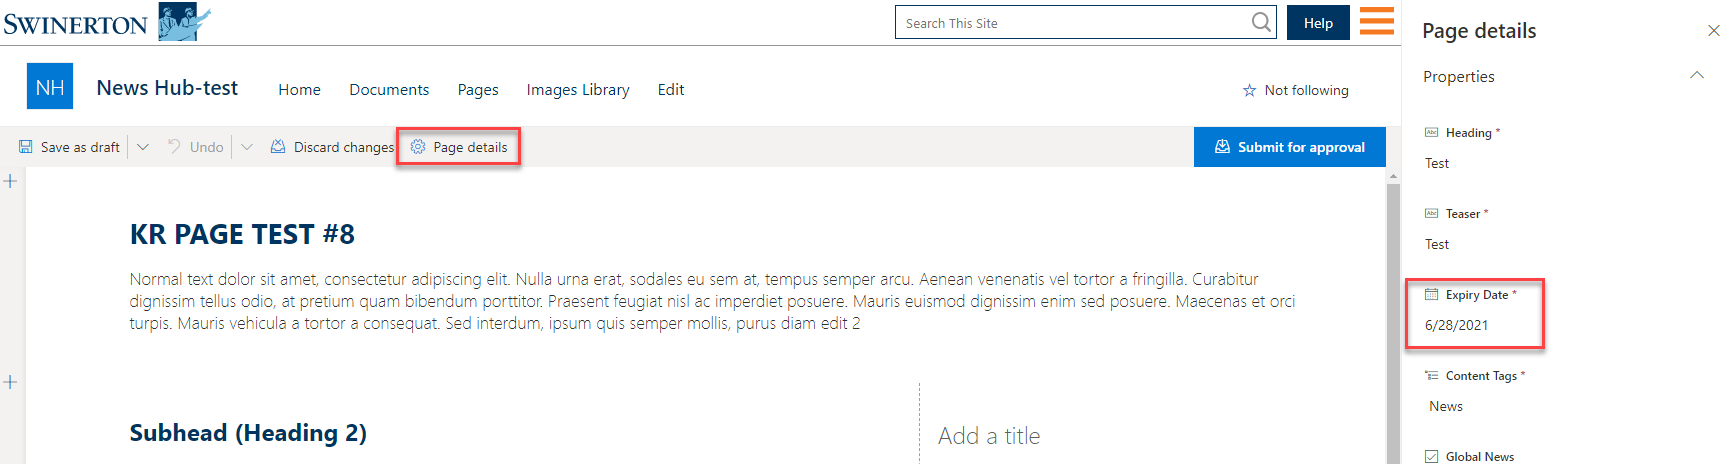
STEP 2a: For a page, you can find the Expiry Date by clicking on the Edit pencil and and then clicking on Page Details. The Expiry Date will appear in the right panel.
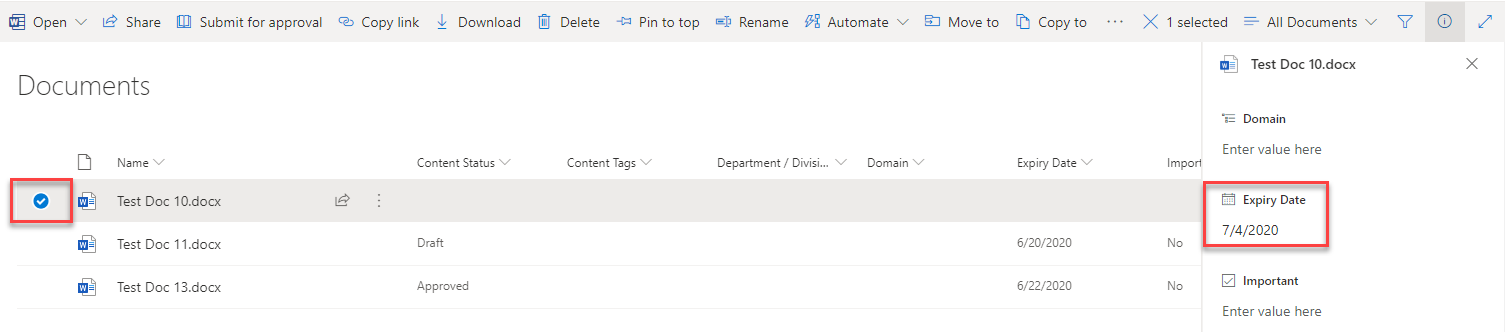
STEP 2b: For a document, go to the Document Library. Check the circle next to the file name. The Expiry Date will appear in the right panel.
STEP 3: Change the Expiry Date (you can extend it up to a year). Then submit the page or document to be published.
STEP 3a: To submit a page for publishing, click the Submit for Approval button on the page.

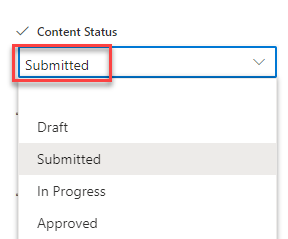
STEP 3b: To submit a document for publishing, select Submitted from the Content Status pull-down menu in the right panel or page properties (above the Expiry Date).
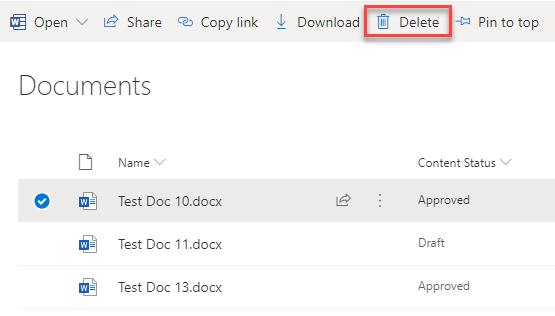
STEP 4: If you no longer want the content, delete it. To delete a file, check the circle next to it and then select Delete.
Be sure to remove any links to the page or document before it is deleted or the content expires.
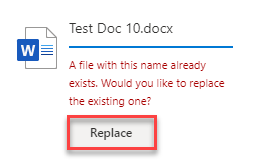
STEP 5: If you want to replace a document with a newer version, upload it to the Document Library with the same name. Click Replace when it asks if you would like to replace the existing one.
Two reasons to keep the same name: It will keep a version history and any links pointing to the document will not need to be updated.
PART 2: Responding to 1-day Notice
You will not get this if you already took action with the 7-day email notification.
STEP 1: Click on the link(s) in your email notification to review the content (page and/or document).
STEPS 2-5: Follow the steps in Part 1 to reset the Expiry Date, publish, delete, or overwrite a document.
PART 3: How to Restore a File from the Recycle Bin
After it expires, your page or document will be stored in the Recycle Bin for 30 days. You can restore it if needed within the 30 days. After that, you must open a ticket and have a strong business case for BTech to retrieve it.
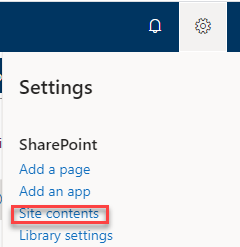
STEP 1: Click on the Gear and go to Site Contents.
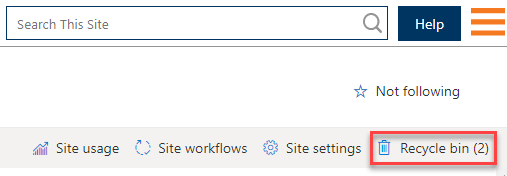
STEP 2: Click on the Recycle Bin.
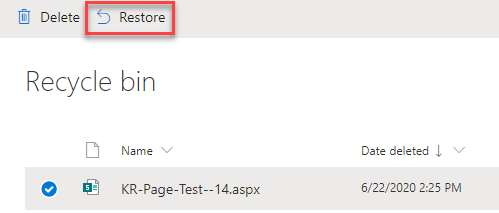
STEP 3: Click the circle next to the file name and then select Restore. This will put your file back in Site Pages or the Document Library.
STEP 4: Your content should return to the Site Pages area or Document Library where it was before. Be sure to reset the date and publish.