Autodesk Field Management - Locations - Setup and Defining
CRITICAL: Make sure your drawings have been uploaded into the plans section before you set your locations. *Checklists and issues linked to documents before locations are defined will not populate the location automatically.
*Only define locations on your Architectural enlarged plans, defining locations on every sheet is unnecessary.
STEP 1: Open BIM 360 website and sign in:
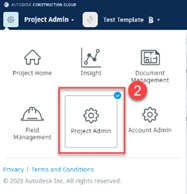
STEP 2: Click on the module selector in the upper left and select Project Admin
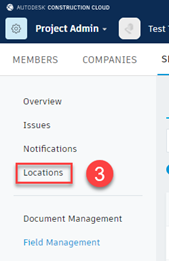
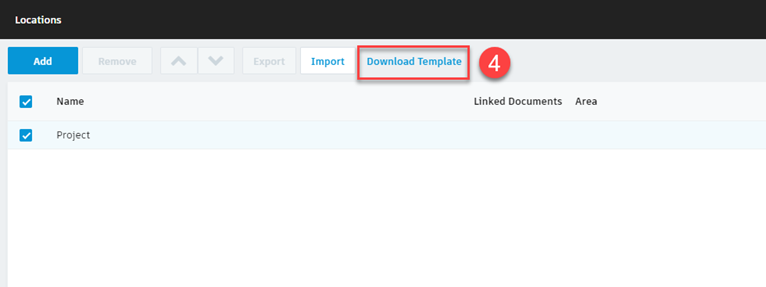
STEP 3: Select Locations on the left-hand side
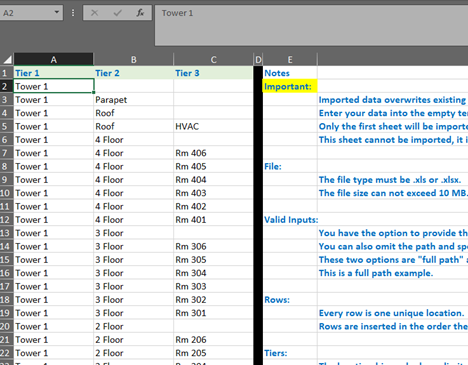
STEP 4: Create your location hierarchy. You can download the template from the locations section within Project admin. Make sure the location hierarchy is on the first tab called “Empty template”.
*Reference location scenarios that best fits your project attached.
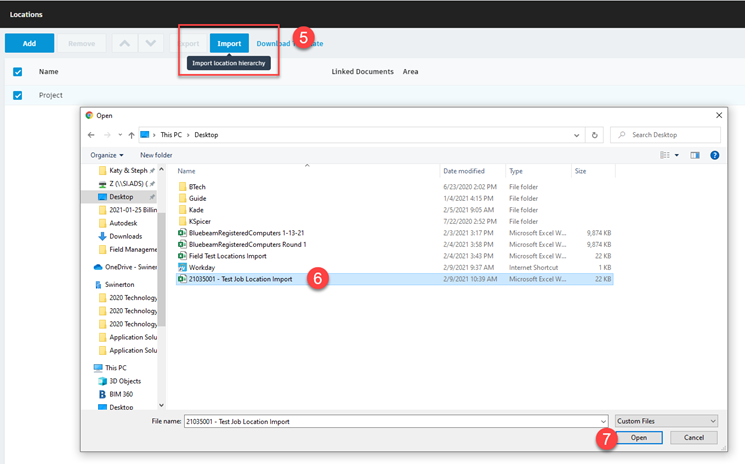
STEP 5: Save your spreadsheet with the job number and name to your desktop or project folder in the z drive and select import.
STEP 6: Select the file you want to import
STEP 7: Select open
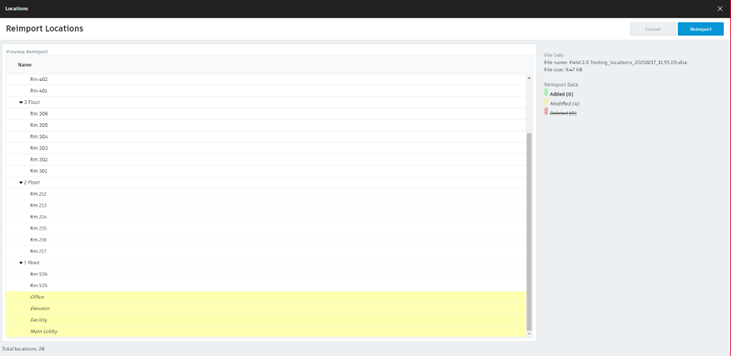
STEP 8: Verify the import spreadsheet looks correct and select import. If changes need to be made, select cancel and make the changes within the excel file and reimport.

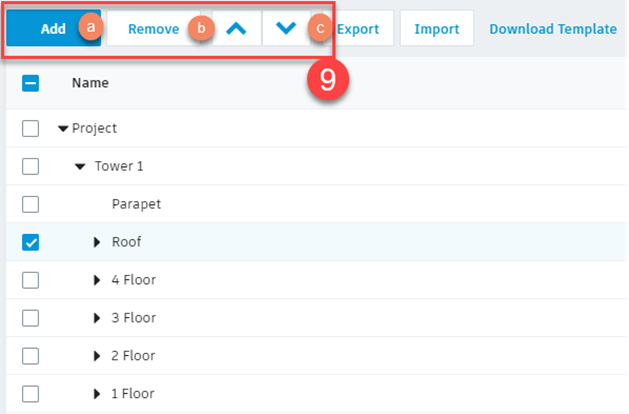
STEP 9: You can adjust the project locations in any order you want. If something doesn’t make sense, adjust it, rename or you can reimport it.
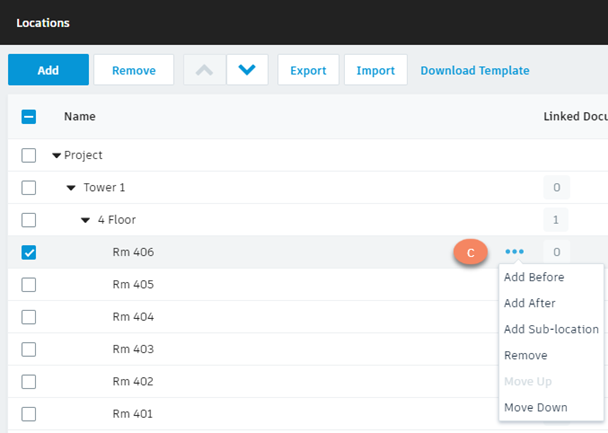
- To add a location manually, click Add
- To delete a location, click remove
- To move a location under another one, select it, click the three dots to the right and move where you need it to go OR you can select the up/down arrow at the top
- **Note** if you need to reimport, EXPORT the locations within the system, make your changes, and then reimport. This keeps the unique identifier tied and prevents double up.
**Reimport**
*Defining your locations: To link a drawing to a location you can apply it at the overall level, and it will automatically associate the drawing with all the rooms below. You can then apply room specific locations within the same sheet. *Reference location scenarios that best fits your project
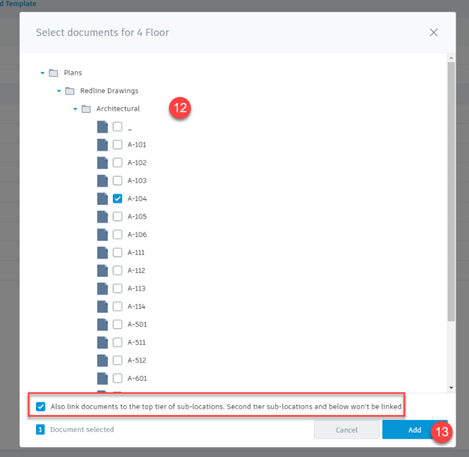
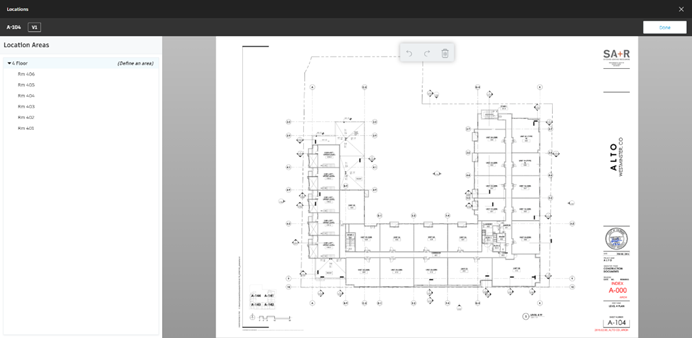
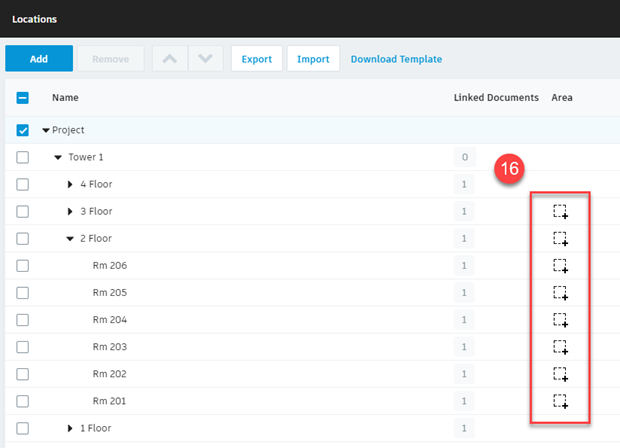
STEP 10: Check the box of the location to define on the drawings
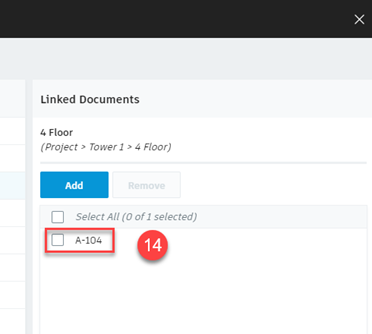
STEP 11: Click Add in the Linked Documents section to the right
STEP 12: Select the *relevant drawings to link to that location/sub-locations.
STEP 13: Click Add

STEP 14: After you have selected the document(s) you want to define your locations with, click on the document name under Linked Documents. This will populate the sheet for you to define the locations.
STEP 15: Zoom into the area you want to define, select the location area on the left and drag your cursor to determine your area. You have the option to use a rectangle or polygon.
- Rectangle: click in the corner and drag your cursor over the area
- Polygon: click once (do not hold) and move your cursor to the next spot, continue until you have defined the area.
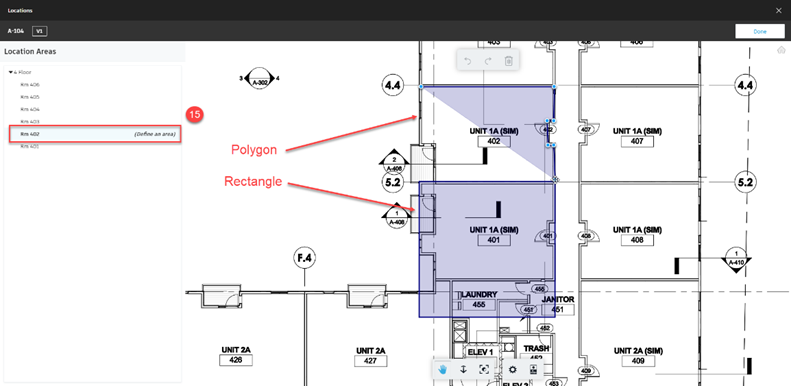
*If you overlap your locations, you will be able to see that in the setup and on the sheet where the locations have been defined. Be cautious about overlapping your locations!
Location set up screen:
Locations on drawings:
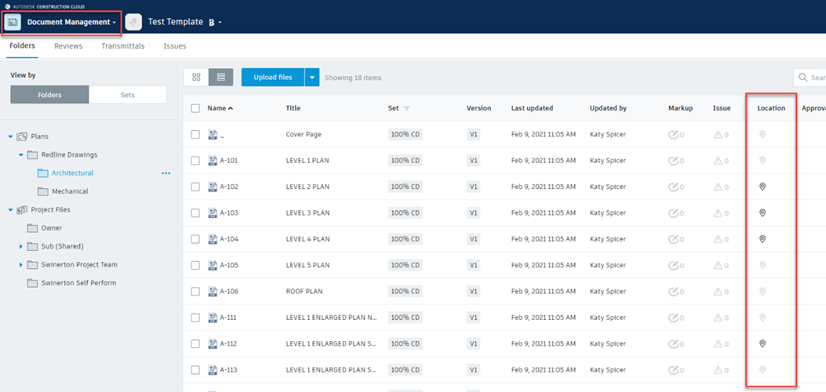
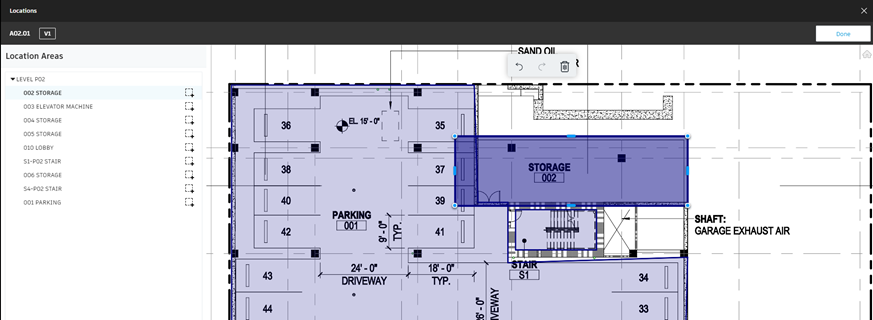
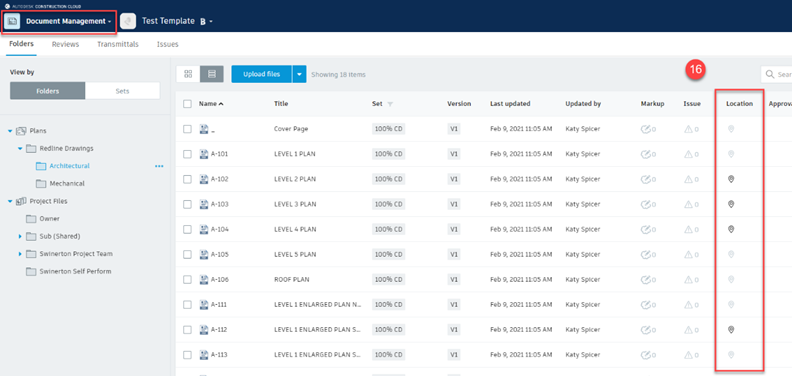
STEP 16: Continue with every location on your list! You can see what locations have been defined by the area and the locations column within Document management.
Example of locations:
STEP 17: You can modify or remove locations! To delete, click on the area and click the delete trash can in the top middle taskbar or right-clicking and selecting remove the shape. To modify, right-click and select Insert Vertex or Remove Vertex

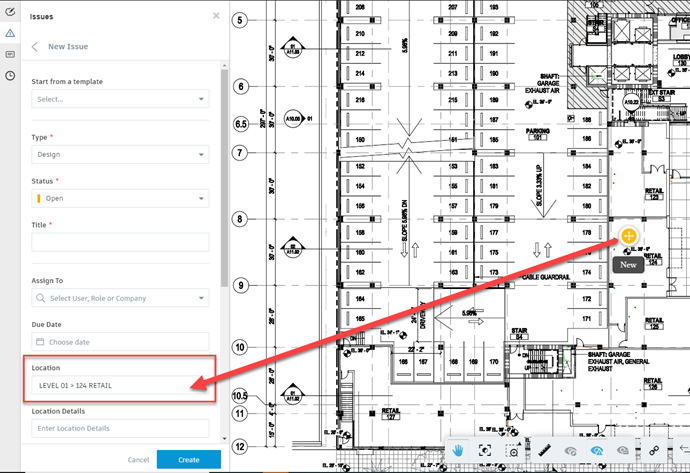
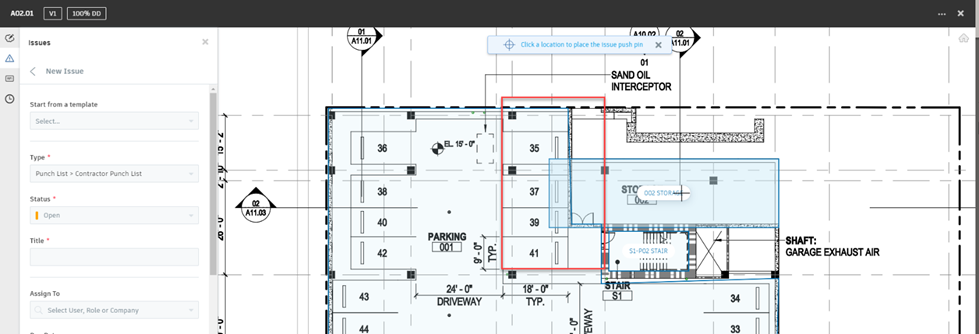
When working with locations for issues or checklists, you no longer need to go to the specific room to put your pin/issue. In Field Management, you can select the drawing that has a location tied to it, put your pin on the sheet and it will pull the location of where your pin was placed which is opposite of Field classic.
Make sure you find a drawing that has the locations set, create your issue, and place your pin where the issue lives. If your locations are set up, they will pull on your issues!