Owner Change Orders
Owner Change Orders
OVERVIEW
- Owner Change Orders are required to Post all "External" types of PCIs (CTO, ALLO, CONT & TR). The OCO module is also used to extend contract end dates.
- PCIs do not legally change the Prime Contract Value or Completion Date. An OCO MUST be issued and fully executed to change the Contract Value or Completion Date. Best practice is to issue an OCO at least monthly for all approved PCIs.
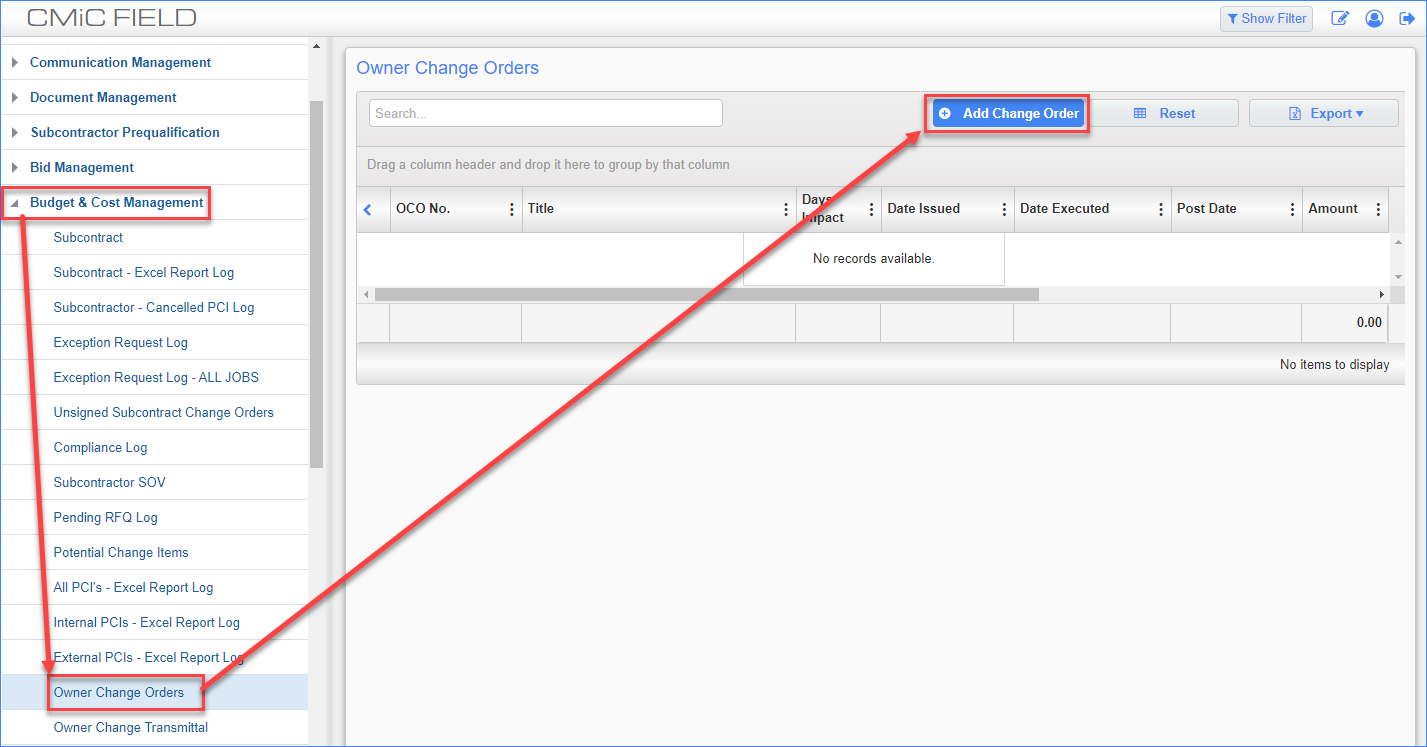
STEP 1: In the tree view, click Budget & Cost Management
STEP 2: Click Owner Change Orders
STEP 3: Click Add Change Order button
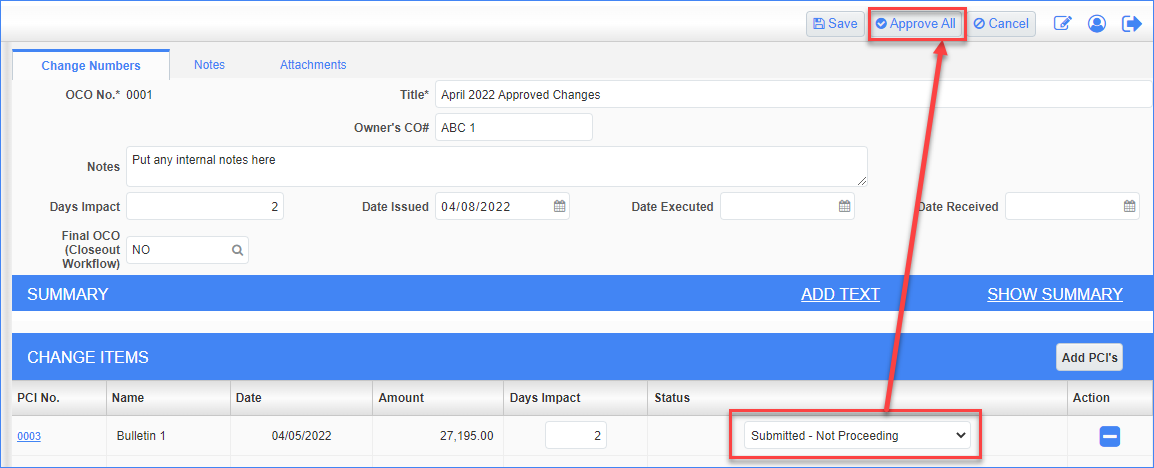
STEP 4: The OCO No. field will automatically populate with the next number. DO NOT CHANGE THIS NUMBER.
IF you do overwrite, you MUST maintain a 4 digit code to ensure proper sequencing. Otherwise OCO 2 will be seen as a higher OCO # than OCO 16 because CMiC reads these as OCO 2000 & OCO 1600 respectively. If incorrect, the Current Contract Value and Completion Date calculations on ALL of your OCOs will be wrong.
STEP 5: Enter the desired information into the Title field. Keep it simple. The PCIs are meant to be the backup for the SOW.
STEP 6: Enter the Owner's CO # if you need to use custom numbering.
STEP 7: The Notes field is optional but can be used to expand on the description of the OCO. This will print on the OCO coversheet.
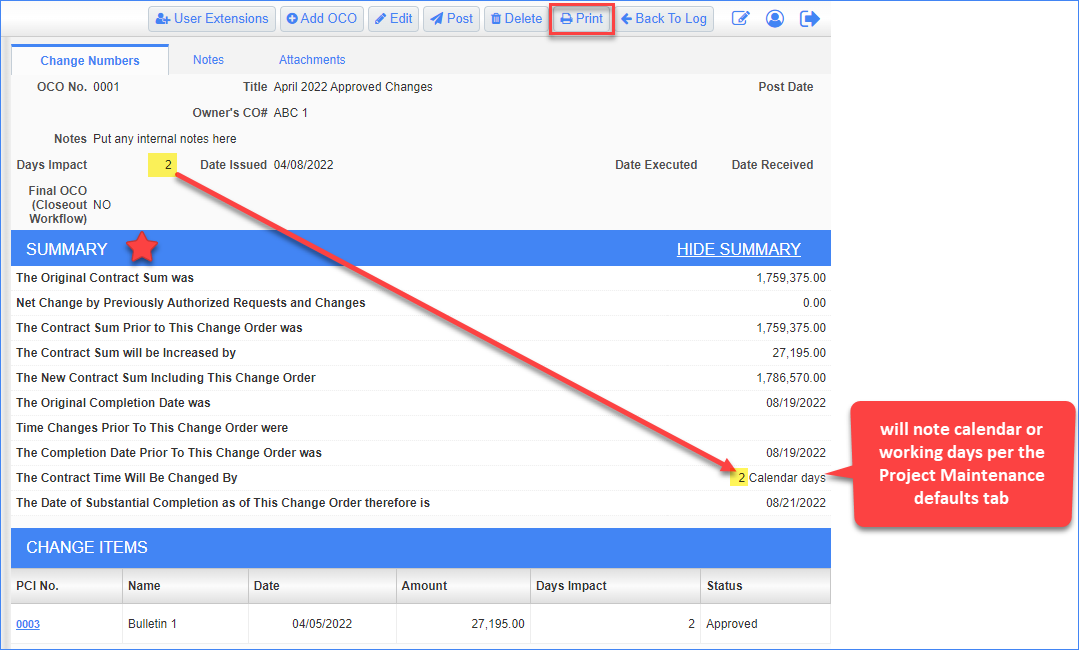
STEP 8: The Days Impact field is what increases or decreases the contract end date (aka Critical Path). This is a manual entry field. Enter the amount of days the contract should be increased or decreased by. Once the OCO is posted, this field cannot be updated.
NOTES:
- The # of days is based on your contract. Review if it is Calendar or Working days. This will also be noted in the Project Defaults tab.
- Work with your superintendent / scheduler to include a Delay Analysis as needed. Enter 0 if there is no schedule impact from this OCO.
- Each PCI will have it's own days impact for those specific tasks and these DO NOT auto populate into the OCO.
STEP 9: The Date Issued defaults to Current Date, but should reflect the Actual Issue date of the OCO. If you are trying to post into the prior period, make sure to back date this date field.
STEP 10: Enter the Date Executed once the OCO is fully executed. This date can be filled in at any time.
STEP 11: Date Received is the date Swinerton received the OCO from the owner. This date can be filled in at any time.
STEP 12: If you are creating the Final OCO, the you need to enter YES into the Final OCO (Closeout Workflow) field. Once the OCO is posted, your FM is notified.

STEP 13: Click the Add PCI's button
STEP 14: Use the check boxes to select the desired PCIs. All Unposted External & Transfer Type PCI's will show in this list, Approved or not. Use the Find box to narrow your search.
STEP 15: Once all of the PCIs are selected, click Accept

STEP 16: In order to POST any OCO, all records must have a status of "Approved". Click the Approve All button at the top of the OCO page to quickly complete this task.
STEP 17: Click Save
STEP 18: Review the Summary section.
STEP 19: Click the Print button to print the OCO Cover page.
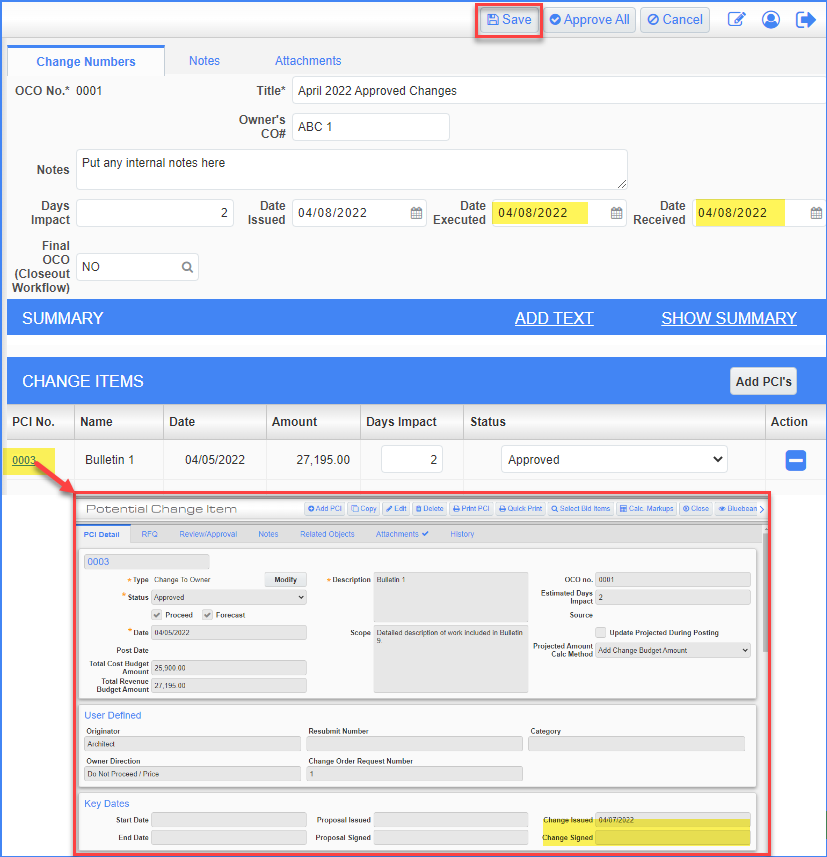
STEP 20: Once you receive the executed OCO, go to the OCO in CMiC, click Edit and enter the Date Executed and Date Received.
STEP 21: Open each related PCI by clicking on it in the PCI No. column, then edit the PCI to enter the Change Signed Date. Once the OCO is posted you CANNOT go back and enter this information.
STEP 22: Click Save
STEP 23: Post the OCO to make it official. Make sure all is correct, as there is no going back!
STEP 22: If you need to post into a prior period, make sure to change the Post Date field here.
STEP 23: Click
Keep Original Markups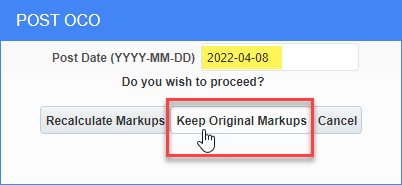
STEP 24: Add the Executed OCO Package to the Attachments tab. Follow these instruction for Attaching a Document in CMiC.