Distribute a Commitment via Docusign
Distribute a Commitment via Docusign
PREVIOUS STEP: Print a Commitment from CMiC
OVERVIEW: HOW TO DISTRIBUTE A COMMITMENT VIA DOCUSIGN:
DocuSign is a fast, easy and secure way to send, sign and track documents in the cloud. Swinerton will be using DocuSign for approved digital signature document signing, which meets the requirements of Swinerton’s company-wide ECM Strategy. At this time, only documents that are approved for DocuSign signing are Subcontracts and Change Orders. No other means of digital or electronic signing programs are approved or allowed. It is important that as a Company we are consistent in our use of DocuSign.
NOTE: Workflow will send the Project Manager and Field Administrator an “FYI” notification that the commitment been approved. *Pay attention to what the workflow notice says as it may also be an FYI that an exception request is required.
NOTE: The Subcontract must have the Status of “In Process”. DO NOT continue with this How To if the status is in not “In Process”.
STEP 1: Login to CMiC.
STEP 2: Select your project.
STEP 3: Click the arrow 4 next to Budget & Cost Management.
STEP 4: Click Subcontract
STEP 5: Click on the specific Subcontract you are working with.
STEP 6: See separate “How to” for printing a commitment.
STEP 7: In Adobe Acrobat / Bluebeam, combine the Work Order / Vendor Agreement and all attachments as one pdf document.
a. Save the combined document to your job files on Z drive
STEP 8: In CMiC, upload the combined Work Order / Vendor Agreement to Attachment tab. Click here for standard upload procedures.
STEP 19: Log into DocuSign.

STEP 10: Click the Start a New Envelope button.
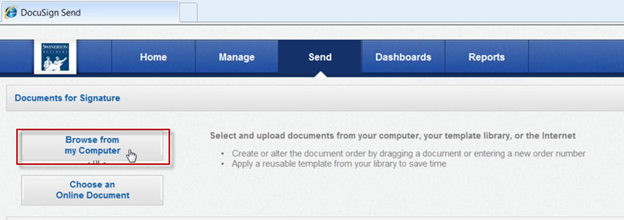
STEP 11: Click the Browse from my Computer button. Look to the job files on the Z drive for the pdf version of the combined agreement document that you created earlier.
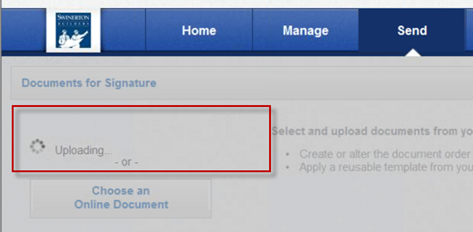
STEP 12: Wait for the document to finish uploading.
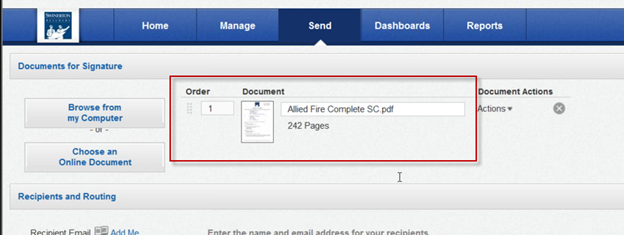
STEP 13: Once document has uploaded, you will see the Document name and number of pages.
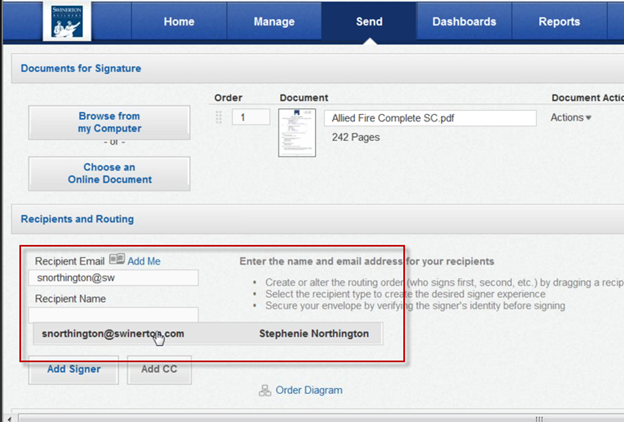
STEP 14: Enter the Recipient Email and Recipient Name. The Recipient Name and Email must belong to the Recipient. You cannot use an Administrative Assistant’s email address and have the Recipient’s Name be the Project Manager.
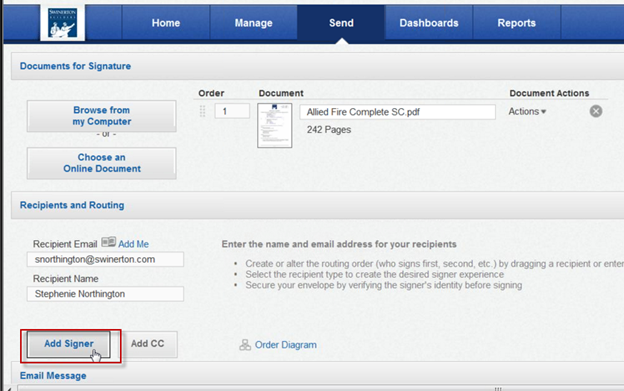
STEP 15: Click Add Signer button.
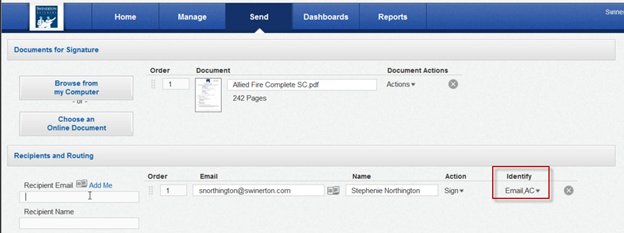
STEP 16: Click drop down arrow next to “Email” under the Identify column. Change to Email AC.
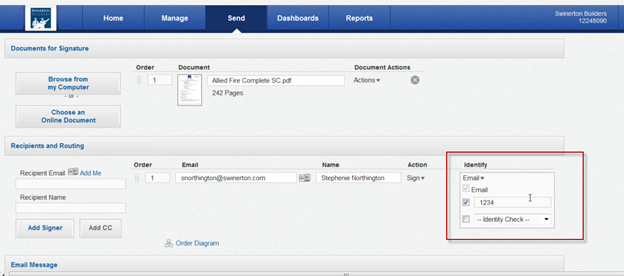
STEP 17: Click drop down arrow next to “Email” under the Identify column.
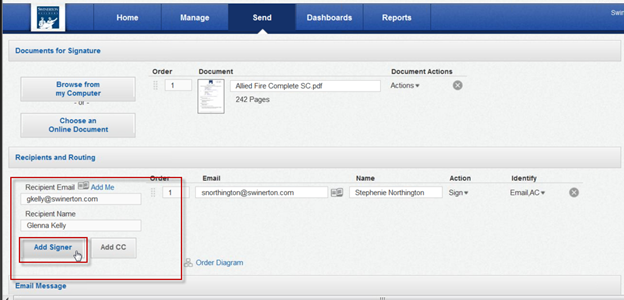
STEP 18: Click over to Recipient Email box.
STEP 19: Enter the email for Swinerton Signer.
STEP 20: Enter Recipient Name for the Swinerton Signer.
STEP 21: Click Add Signer button.
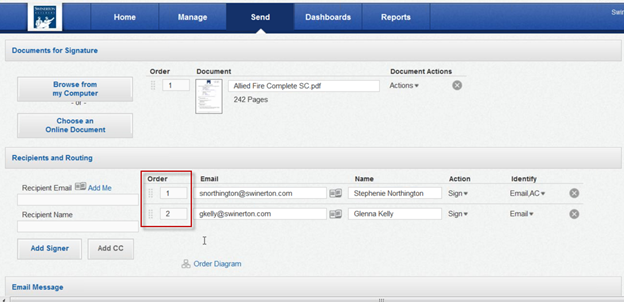
STEP 22: Change the Swinerton Signer to be second in Order column
.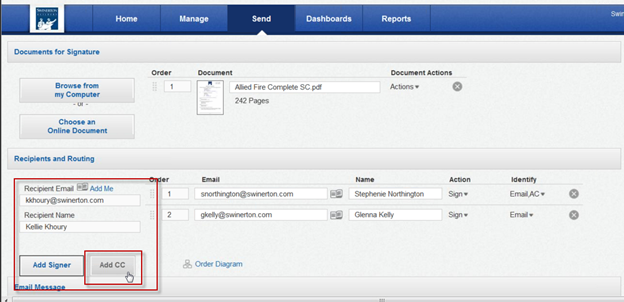
STEP 23: Add Project Accountant as “CC” if applicable. This allows the Project Accountant to know when the Agreement has been signed.
a. Enter Recipient Email and Recipient Name.
b. Click Add CC button.
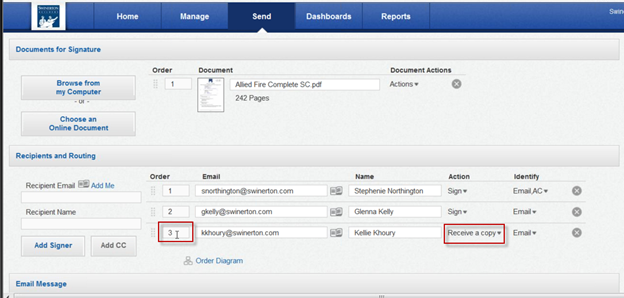
STEP 24: Change the Accountant to be third in the Order column and Receive a copy in the Action column.
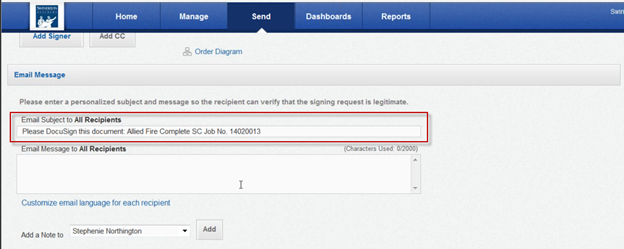
STEP 25: Scroll towards bottom of page under Email Message section.
STEP 26: Modify Email Subject to All Recipients.
a. Remove “pdf”.
b. Add “Job No. ########” to the Email Subject. This makes it easier to search for it later.
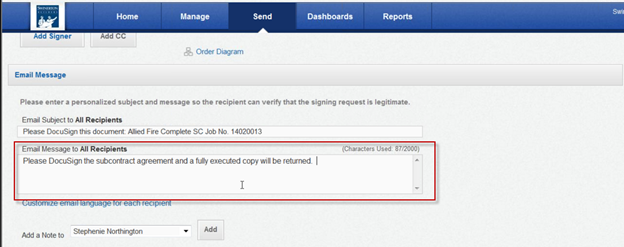
STEP 27: Click in box for Email Message to All Recipients. Add message for Subcontractor.
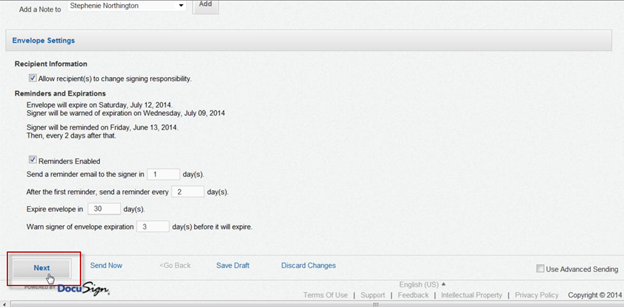
STEP 28: DO NOT CHANGE ANYTHING ELSE.
STEP 29: Scroll to the bottom of screen and click NEXT.
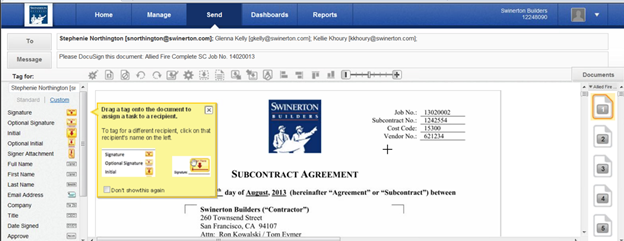
STEP 30: Scroll through the document to the signature area on the Agreement.
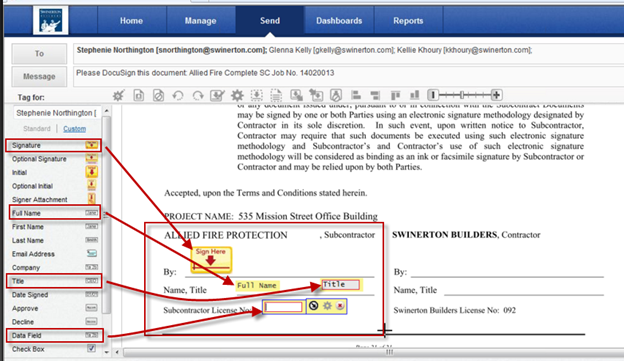
STEP 31: Drag and drop the Subcontractor’s tags:
a. Signature tag to the “By:” line.
b. Full Name tag and Title tag to the “Name, Title” line.
c. Data Field tag to the “Subcontractor License No.” line. This requires the Subcontractor to fill in their license number.
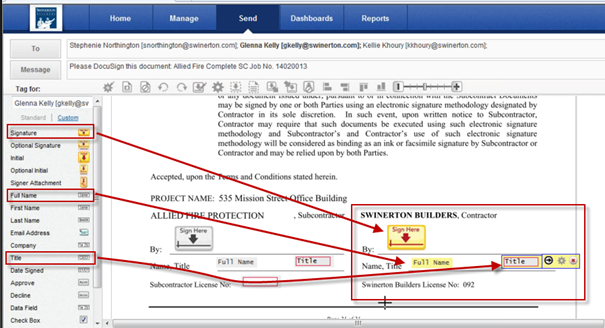
STEP 32: Drag and drop the Swinerton Signer tags:
a. Signature tag to the “By:” line.
b. Full Name tag and Title tag to the “Name, Title” line.
STEP 33: Continue to tag signature locations as needed throughout the document. For example, if there is an Attachment K, it must be signed also.
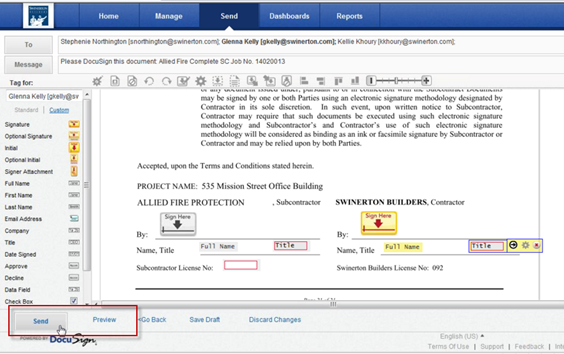
STEP 34: Click the Preview button, if desired.
STEP 35: Click the Send button.
STEP 36: If you do not preview, you will receive a popup window. You can click Preview Now if desired.
STEP 37: Click Send Anyway button.