How to edit or delete an Office 365 Group
Overview
With the move to Office 365 Online we are also migrating distribution lists into “Office 365 Groups” – The groups function much like a classic distribution list but with many more features. One of the new features is managing the group directly from Outlook. Follow the below steps to manage an existing Office 365 Group. IMPORTANT: You must be an Owner of the group to make changes.
Process
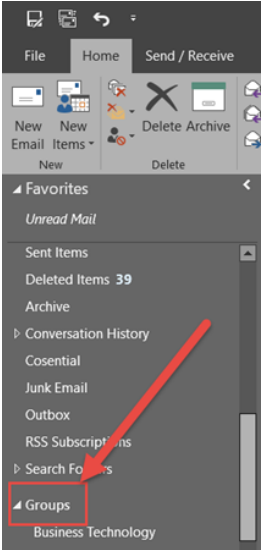
1. From within Outlook, find and expand ‘Groups’ (located on the left side below all the inbox folders).

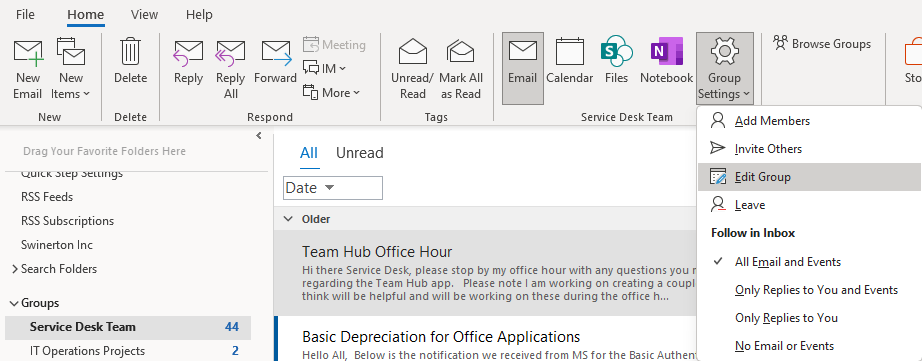
2. Find and click on the group you’d like to manage (in this example I'm using the Service Desk Team, group.
3. Once the group is selected you’ll see a ‘Group Settings’ button at the top of Outlook.
4. Select it then click ‘Edit Group’ to open the editor window.

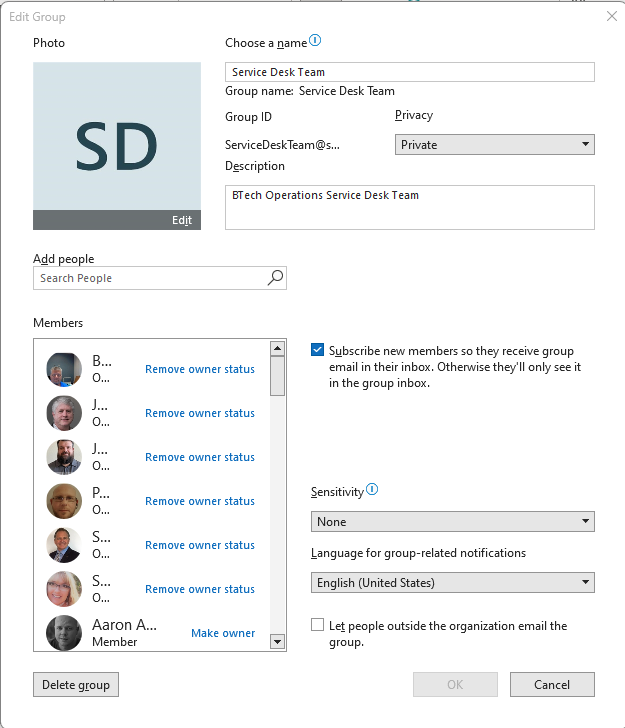
5. From here you can manage the group – you can add/remove owner status, add/remove members, change groups settings, and even delete the group (so be careful!)

6. Once you’re finished making changes click ‘Ok’ to save them