Launching and submitting the JIP request process
Initiating the JIP from Unanet
- Manage your opportunities normally in Unanet until you are ready to convert the opportunity to a Job In Progress (JIP)
- Does the Opportunity have a Bid Job # already?
Step 1 - The stage of the Opportunity must be changed to or already be “10a-Sale Pending, or 10b-Sale Closed (Preliminary Award)”
- Navigate to the Opportunity Record through your Opportunity Gird, or Unanet’s quick search
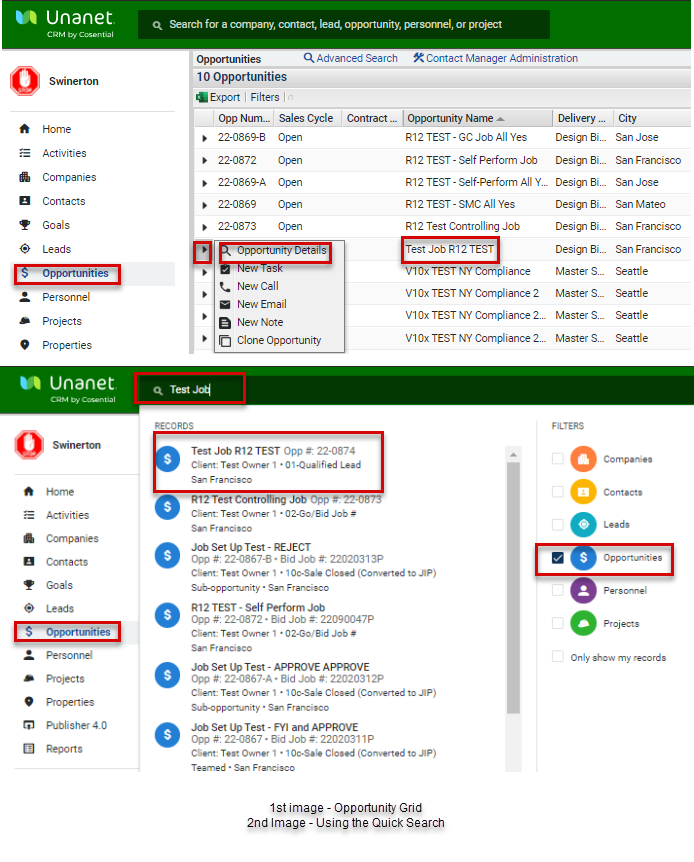

- Change the Stage field to “10b-Sale Closed (Preliminary Award)”
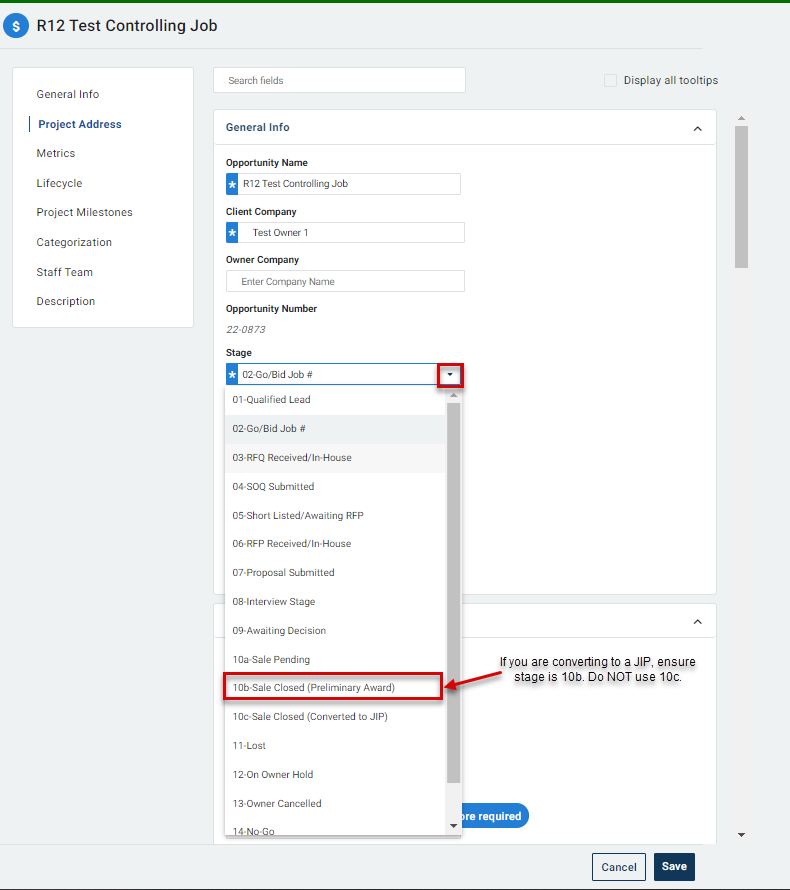
- Additional Mandatory fields are highlighted in blue and MUST be completed to proceed with creating a JIP
- Additional Required Fields (if they haven't already been completed)
- Opportunity Name
- Client Company (also re-entered in JIP form)
- Stage
- Publicly Funded?
- Prevailing Wage?
- Business Enterprise/Outreach Requirements?
- Project Address (Address, City, State, Zip Code) NOTE: Zip code must be valid
- Bid Bond/Guarantee Required
- Potential Swinerton Revenue
- Client Probability
- Win Probability
- Fee %
- Priority to Division
- Anticipated Date of Award
- Project Duration (in Days)
- Construction Start Date
- Construction Completion Date (auto-populates)
- Primary Market
- Job Department
- Secondary Market
- Product Type
- Construction Types
- Delivery Methods
- Contract Type (entered into JIP form)
- Job Folder Set Up Type (entered into JIP form)
- Submittal Type/Effort Level
- Project Role
- Description
- NOTE - If you do not ensure all mandatory fields are completed, you will not be able to submit your JIP for approval/creation
- Complete all required fields and press “Save”
Step 2 - Initiating the JIP From Unanet
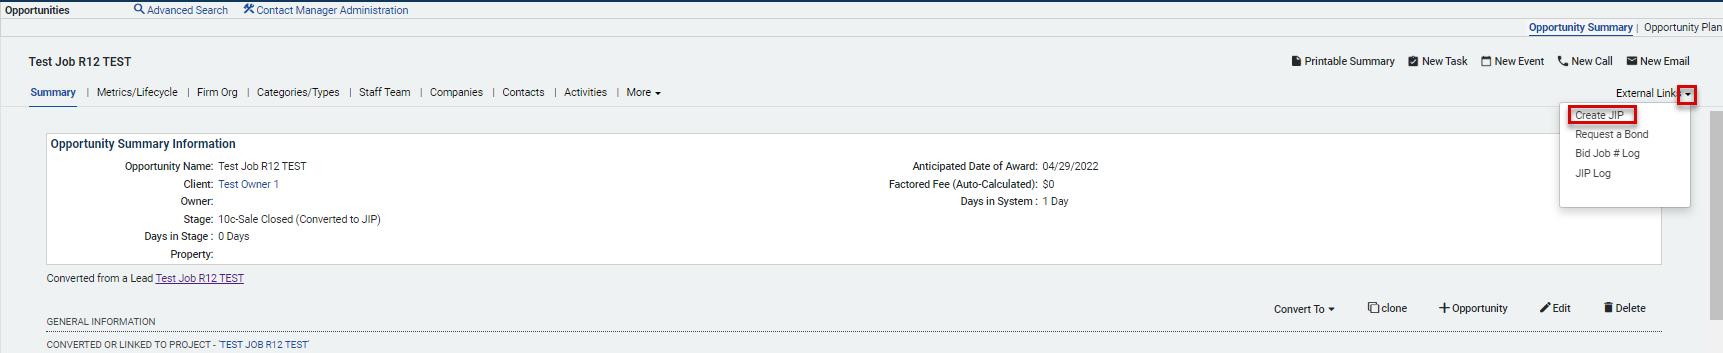
- Click on “External Links” from the Opportunity Record in Unanet
- Then click “Create JIP”
- You are taken to Boomi Flow (Program) to create the JIP record

Step 2a - Handing off JIP Data entry to a PM or other staff
- If you are handing off the entry of information to someone else for the JIP, Press "Save" and notify appropriate personnel/Project Team that Boomi Job Start (JIP) Form is ready for inputting information.
- The JIP can then be accessed via the JIP Log which is accessible via -
- CMiC Field Tree View under Swinerton Links
- Unanet External Links

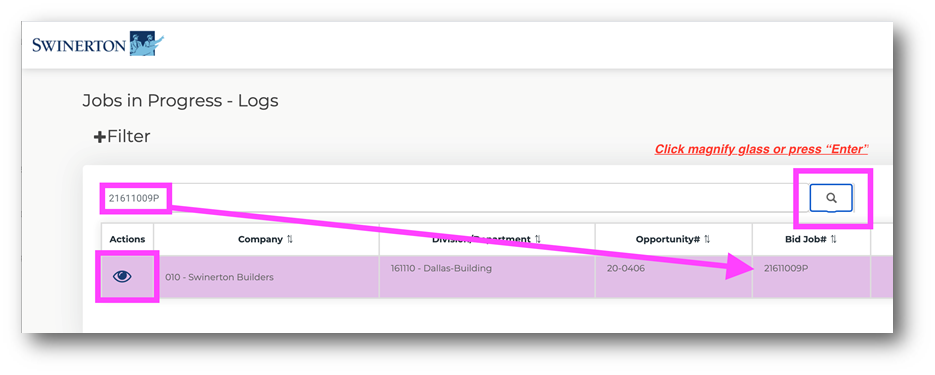
- Once you come to the JIP Log, you can search for the Bid Job # to access the Boomi JIP Form for that job
Step 3 - Converting the Opportunity to a Project Record in Unanet
- WARNING – BEFORE FOLLOWING THE NEXT STEPS ENSURE THAT ALL INFORMATION IN THE UNANET OPPORTUNITY RECORD IS ACCURATE. ONCE YOU PROCEED, THE INFORMATION IN THE OPPORTUNITY RECORD WILL NO LONGER TRANSFER INTO THE UNANET PROJECT RECORD
- From the Unanet Opportunity Record
- Press the Convert Opportunity To button
- Check Unanet Project
- Press Convert, and click “Yes” in the confirmation window
- This
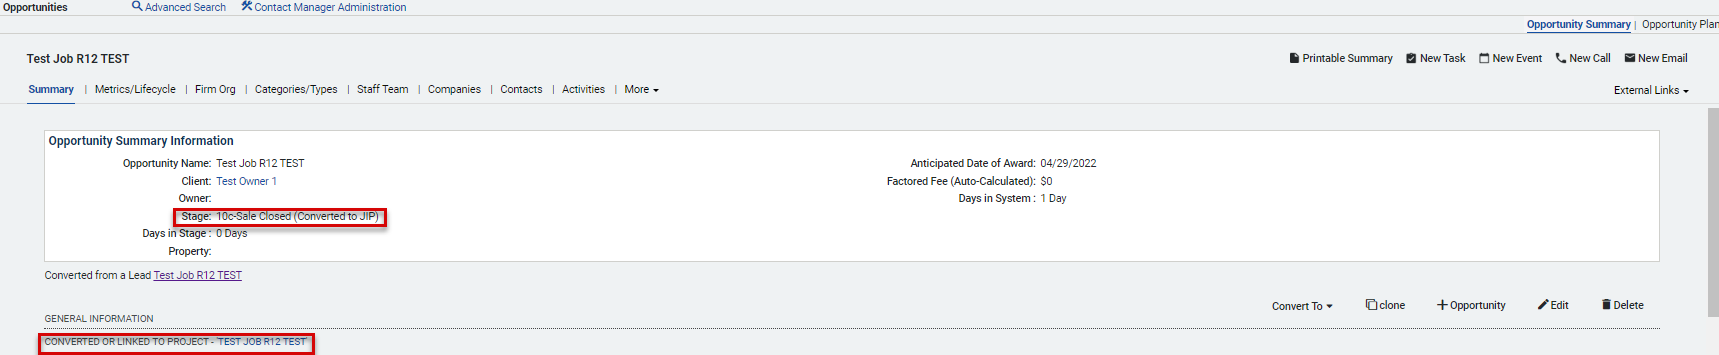
- Creates a Project Record (Marketing) in Unanet and brings over all the relevant Opportunity Data
- AUTOMATICALLY Changes the Opportunity Stage in Unanet to 10c-Sale Closed (Converted to JIP)

Step 4 - Submitting the JIP For Approval
- Click the “Create JIP” link in the Opportunity Record in Unanet one last time to
- This ensures the information is updated and accurate (and allows Boomi to confirm you have converted the Opportunity to a Project)
- NOTE - You will not be able to submit your JIP for approval unless you have converted the Unanet Opportunity to a “Project” as noted in the previous steps
- You are taken to the Boomi JIP Form one last time
- Press “Save & Submit when you are ready
- The form will conduct a final validation before submitting and prompt you if you’ve missed anything with a pop up in red in the upper right of the screen
- If you don’t have any errors, you will receive notification that your JIP was successfully submitted for approval by the Risk Manager and Finance Manager
- You can see the approval status via the Workflow History page of the Boomi JIP Form
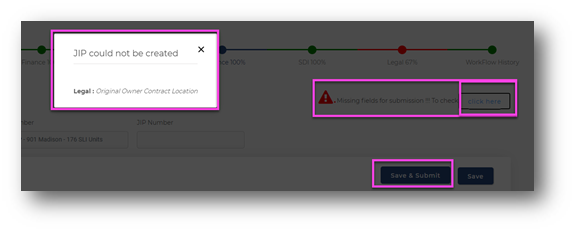 Save and Submit Button clicked with Missing Information
 After clicking Save and Submit successful submission
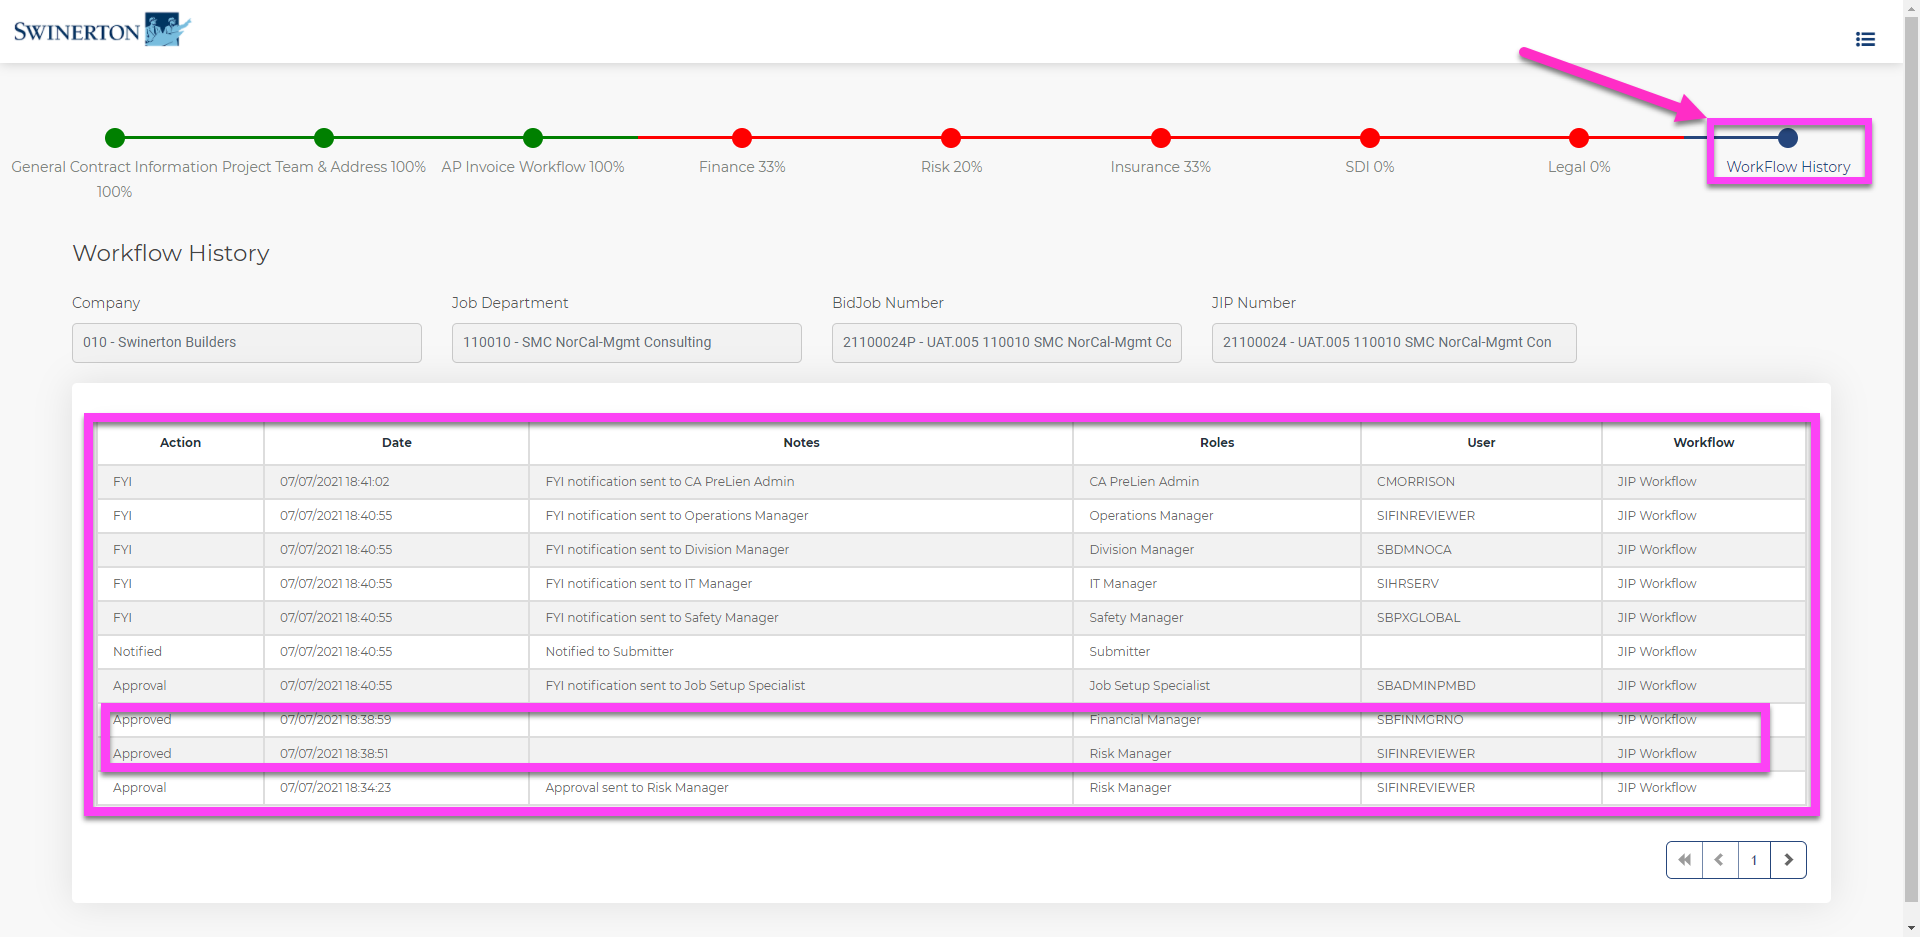 Workflow History and Status of Approvals and Checks