Create a Transmittal
How to Create a Transmittal in CMiC
OVERVIEW
Whenever you send a project related item such as drawings, material samples, or submittals you want to be able to create a cover letter/memo to accompany the item(s) and track when, and to whom the item was sent. Transmittals provide the mechanism to accomplish both of these tasks. Every transmittal is stored on the system and can be re-sent or duplicated if required. From a project management point of view, transmittals provide a formal source of proof that items were sent and the reason for their transmittal. This document provides instructions on how to create a new transmittal and print it.
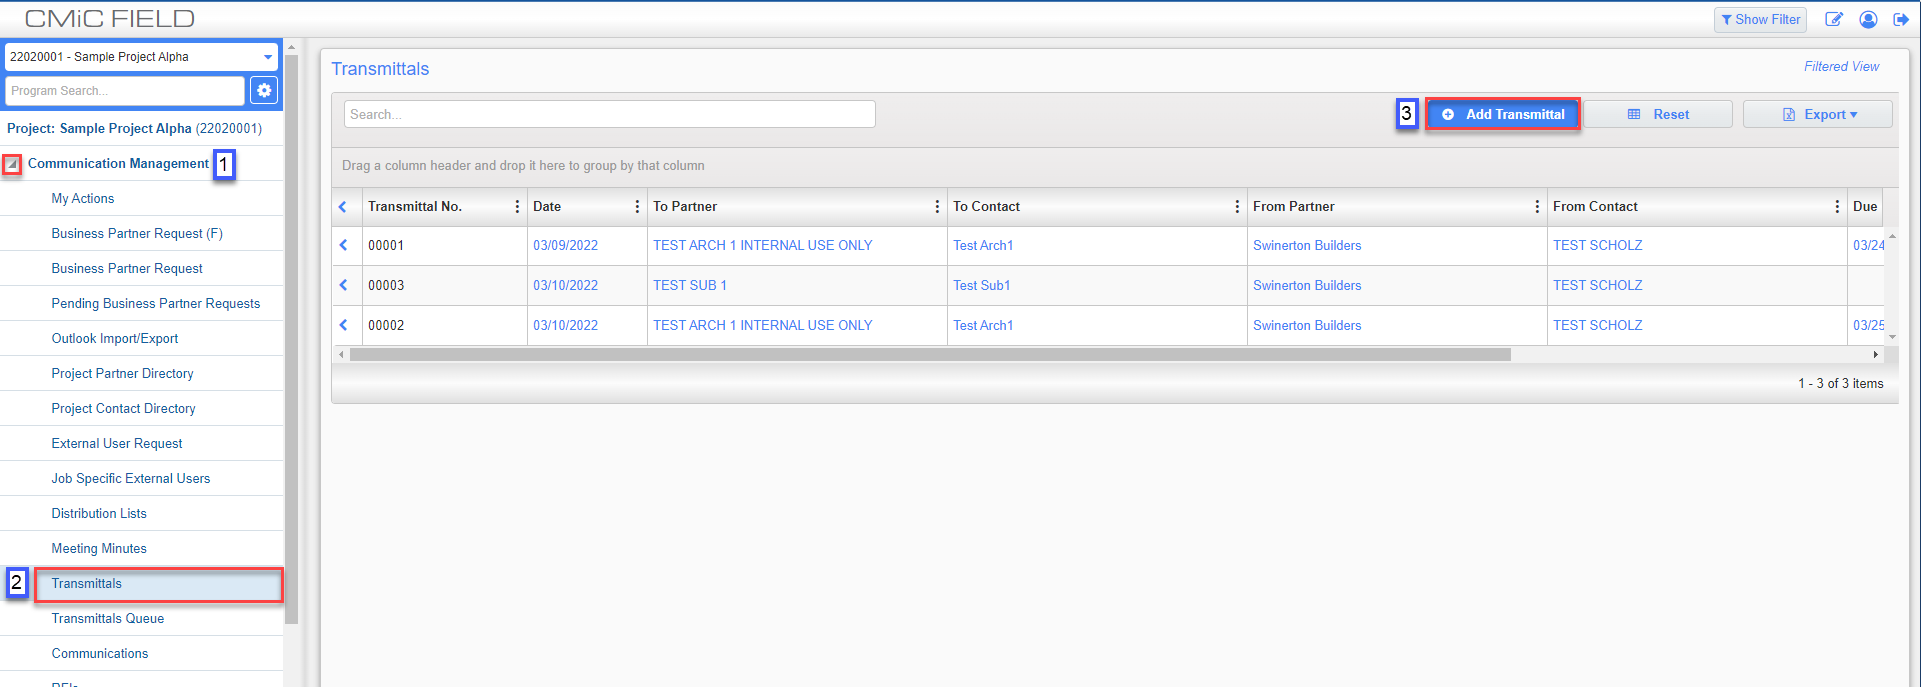
STEP 1: Click the arrow (4) to the left of Communication Management
STEP 2: Click Transmittals
STEP 3: Click the Add Transmittal button to add a new Transmittal record
STEP 4: In the Transmittal Details screen:
a. Transmittal No: This number is a defaulted in system next number and cannot be modified.
b. Submitted checkbox will auto check and stamp the date/time once the Transmittal is sent.
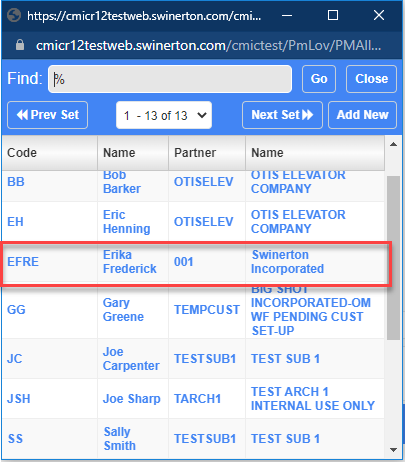
c. From: Accept self as default in the From field, however, if you are entering this Transmittal on behalf of someone else, you can Click the Magnifying Glass to display the List of Values (LOV) Project Contacts and make your selection, see below.
d. Date: Accept default of today’s Date or modify the date using MMDDYY format.

e. In the To field, click the Magnifying Glass to display the List of Values (LOV) to select the Project Partner you would like to transmit to
-or- if they are not a Project Partner, you can click on the Free Form checkbox and type in a name manually.

f. Received checkbox should be left blank as it is auto-checked based on the status of the Transmittal.
g. CC button: If additional Project Partners need to be copied on this Transmittal click on the CC button to expand the field.
g.1. Click the Magnifying Glass to display the List of Values (LOV) to search and select the Project Partner(s) you would like to CC on this Transmittal. This is where you can use the Distribution Lists that you set up already. Click HERE for how-to setup a distribution list
g.2. Click the checkbox to the right of the Project Partner(s) in the List of Values (LOV) as CC (s) on this Transmittal.
g.3. Click the Accept button to select CC’s for this Transmittal.
h. Re: Enter a short description of what this Transmittal is Regarding.
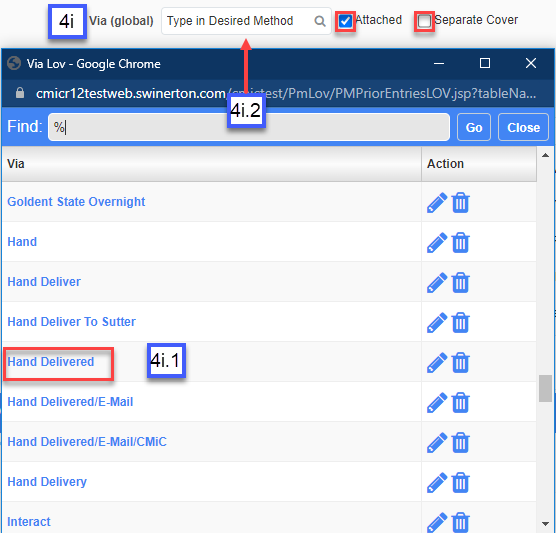
i. Via (global): You have two (2) options:
Option 1: Select existing Via using the List of Values (LOV), click the Magnifying Glass to display the List of Values (LOV). Click on the Via Description applicable for this Transmittal.
Option 2: Create new Via by typing into this field free form, Type in non-existing Via in the Via field.
First, Click the applicable checkbox beside the Via field:
- Attached: Documentation is included and attached with the transmittal
- Separate Cover: Documentation is not included and will be sent via another method
j. Due Date: Enter Due Date if required for item (s) included in this transmittal. Use MMDDYY format, or click on the Calendar and select the required date in the pop-up window..
k. Click the checkbox to the left of the appropriate type of content included with this Transmittal. If not listed, check the “Other” box and type in free form, or click on the Magnifying Glass and select the desired content.
l. In the Actions section accept default of Send, or change to Forward or Return if appropriate.
Status Defaults By Detail Lines, accept this default, unless clicking on the down arrow provides a better option.
Click the checkbox to the left of the appropriate Action for this Transmittal. If not listed, check the Other box and type in free form.

m. Type in any remarks you would like to include for the recipient for this Transmittal

n. Click the Save button in the upper right hand corner of the screen.

NOTE: This step is critical if you will need to upload any attachments to include in your Transmittal items.
STEP 5: Click the Plus (+) Sign in the Transmittals Items section under the Action column.

a. Item #, Item that is being transmitted, the number is Auto-populated by the systemb. Qty: Enter the Qty of the item(s) you are transmitting.
c. Item: You have three (3) Options to complete Item:
Item Option 1: Selecting a file stored within CMiC System that can be selected from the List of Values by clicking the down arrow.
Item Option 2: Selecting a Free Form (FF) field if you are not including a stored document in the CMiC system, check the checkbox in the FF column and type in a description the Item field.
Item Option 3: Using the Upload New/Upload Multiple Attachment process.
d. Date: Accept default of today’s Date or enter the applicable Date for this item(s). Use MMDDYY date format, or click on the Calendar and select the desired date.
e. Option 1: Select the document you are attaching from the Item (Folder) you selected (see 5c). This will auto populate the date, revision, Description and Status fields and attaches the document to the transmittal.
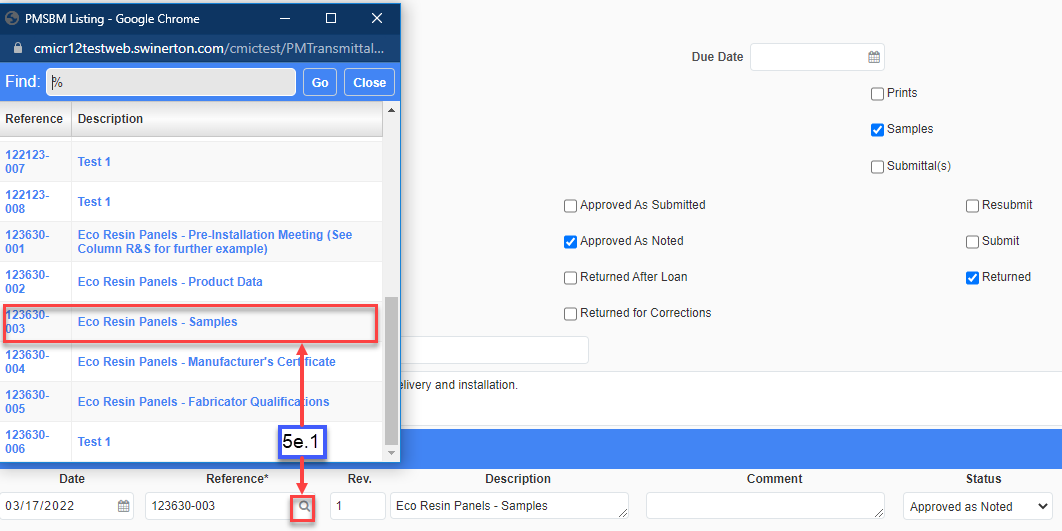
Option 2: If using Free Form, type in a Reference.

f. Rev. If using Free Form, enter revision number or leave blank and system will default to 0 (zero).
g. Description: If using Free Form, enter a short Description for this item.
h. Comment: Enter a Comment if applicable to the item(s)
i. Status: If Status is applicable to the row, select appropriate Status otherwise, no status values will be available for selection.
Option 3: Upload or Upload Multiple: Exit out of Edit mode (click Save) and select Upload or Upload Multiple go through the attachment process. Instructions on Attachments can be found in the Attachment How To document.


STEP 6: Click the Submit button in the upper right hand corner of your screen to save and submit the Transmittal into the CMiC database.
STEP 7: Click the Print Report button at the top right side of the screen.

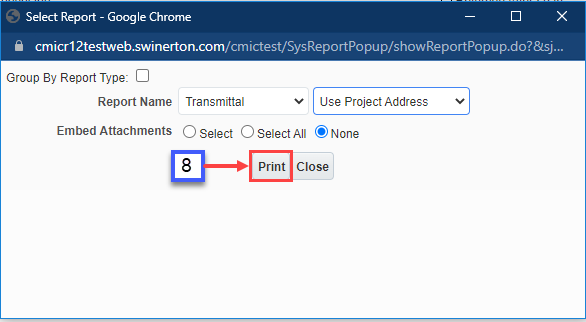
STEP 8: In the Print Report window accept defaults, Click the Print button.
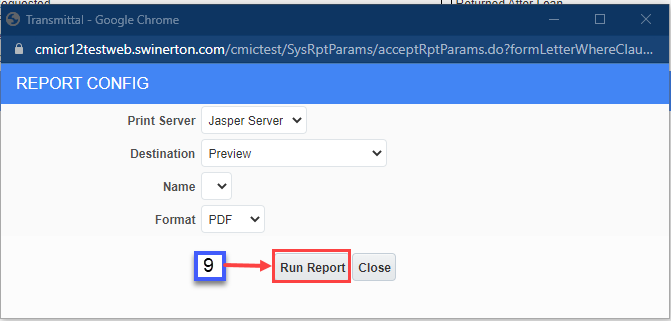
STEP 9: In the Report Config window, click the Run Report button
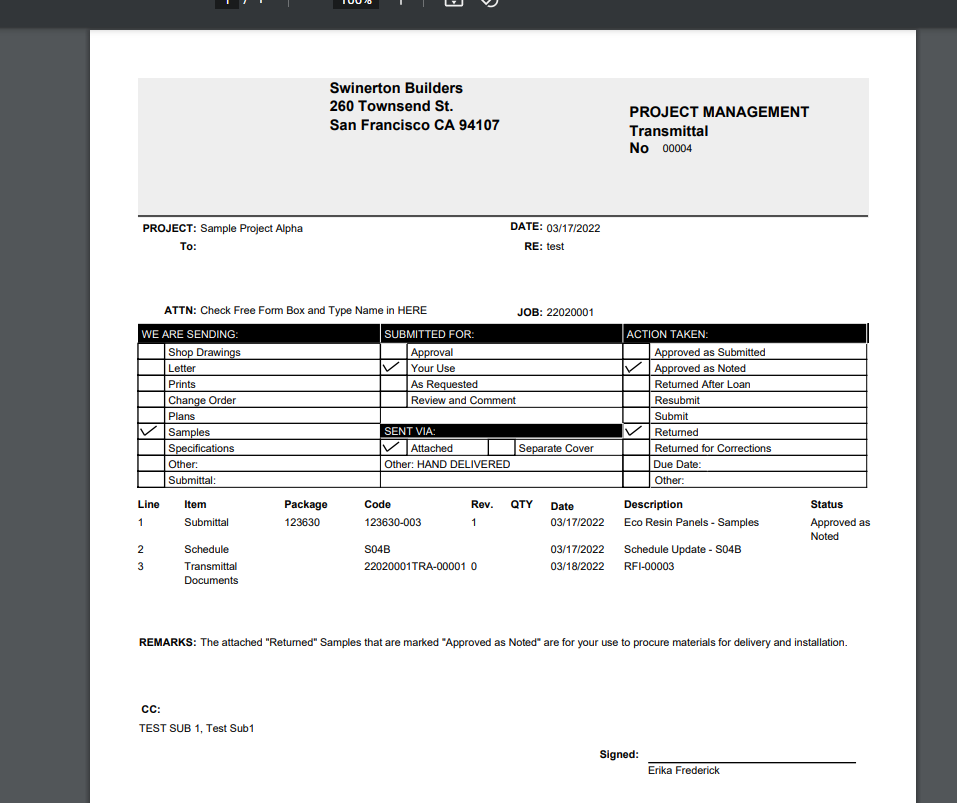
PDF Print report